
Construye Tu Propia Máquina Casera para Hacer Bloques: Una Guía Completa de Bricolaje
Introducción
¿Qué tal si pudieras construir tú mismo las paredes de tu cobertizo, el borde del jardín o un pequeño proyecto al aire libre, comenzando con los propios bloques? Imagina la satisfacción y el ahorro significativo en costos. Para los entusiastas del bricolaje, los granjeros autosuficientes y los propietarios de viviendas, el alto precio de los bloques de concreto comerciales y el costo prohibitivo de la maquinaria fabricada en fábrica pueden frenar incluso los proyectos más ambiciosos.
La solución radica en un concepto poderoso y ancestral: construir tus propias herramientas.máquina casera para hacer bloqueses una alternativa asequible, personalizable y profundamente gratificante. Te permite producir bloques resistentes y uniformes en tus propios términos, transformando materias primas en componentes de construcción funcionales.
Esta guía integral se basa en una base de experiencia práctica de taller, principios mecánicos probados y ciencia de materiales. Te guiaremos a través de todo, desde comprender cómo funciona una prensa manual simple hasta una guía de construcción detallada y los secretos del curado perfecto de bloques. Ya seas un aficionado con habilidades básicas de metalurgia o un granjero que busca ser más autosuficiente, esta guía es para ti.
Esto es lo que aprenderás:
* Las mecánicas centrales y los diferentes tipos de bloques que puedes crear.
* Principios de diseño esenciales para una máquina estable y duradera.
* A step-by-step construction guide with a tools and materials checklist.
* How to master the concrete mix and curing process for professional-grade results.
* Honest answers to frequently asked questions.
Let’s build the capability to build.
Understanding Home Made Block Making Machines
Before cutting any metal, it’s crucial to understand what you’re building. A homemade block machine is a study in elegant, manual force application.
How a Manual Block Machine Works
At its heart, a DIY block machine is a lever-operated mechanical press. It doesn’t use hydraulic systems or electric vibration like industrial models. Instead, it relies on simple physics.
El proceso es sencillo:
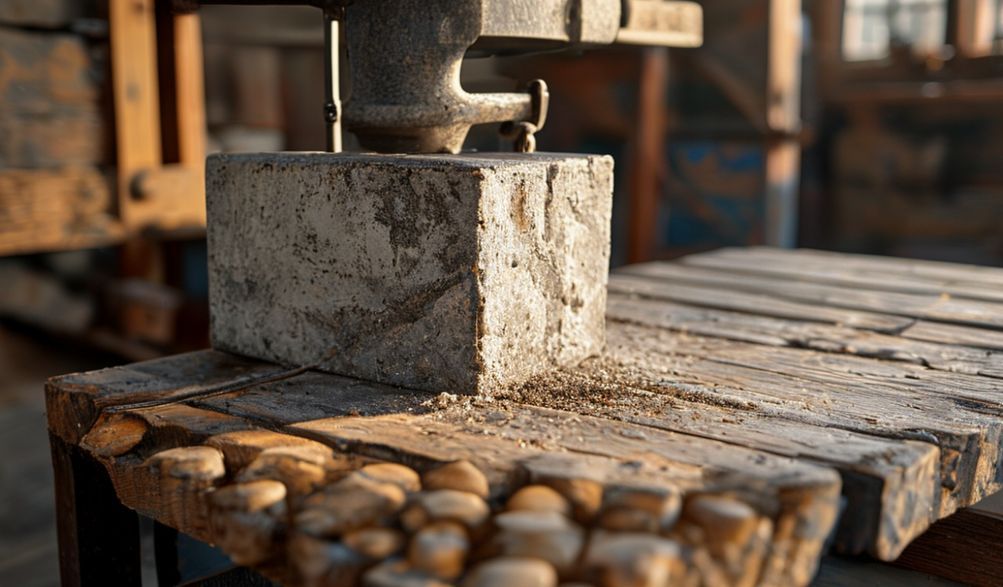
1. A mold box is filled with a damp concrete mix.
2. A palanca is pulled down, driving a compression platen into the mold.
3. This manual force compresses the mix, removing air pockets and consolidating the material into a dense, coherent shape.
4. The mold is then opened, and the “green” (un-cured) block is carefully ejected.
The key is consistent pressure and a well-designed mold. From our workshop experience, achieving uniform density is more important than extreme, uncontrolled force.
Types of Blocks You Can Make
Your machine’s versatility is defined by its mold. By building interchangeable mold boxes or inserts, you can produce:
- Bloques de Concreto Sólidos: Dense and heavy, ideal for foundational courses, retaining wall bases, or any structure requiring maximum mass and strength.
- Hollow Core Blocks: Lighter and more material-efficient. The hollow cores reduce weight, provide insulation, and can be used for rebar in certain applications. Perfect for partition walls or single-story garden sheds.
- Adoquines y Ladrillos de Entrelazado: For patios, walkways, and driveways. These require a shallow, open-faced mold and often feature textured surfaces for slip resistance. Interlocking designs need precise mold machining for the tongue-and-groove patterns.
Pro Tip: Start with a simple solid block design (e.g., 8″x8″x16″ or a smaller metric equivalent) to master the process before attempting more complex hollow or interlocking molds.
Benefits of Building Your Own vs. Buying
Why go through the effort of building your own machine? The advantages are compelling:
- Rentabilidad: A commercial manual block press can cost thousands. A homemade version can be built for a fraction of that, often between $150-$400, depending on materials.
- Unmatched Customization: Need a specific size or shape for a unique project? You are the designer. Add texture to the mold face, create custom curves, or experiment with block proportions.
- Skill Development & Profound Satisfaction: The pride of building a structure with blocks you made on a machine you built is unparalleled. It’s the ultimate DIY achievement.
However, we must be transparent about the practical limitations:
* Tasa de Producción: This is not mass production. A solo operator might produce 30-50 finished blocks in a full day, accounting for mixing, pressing, and handling.
* Intensidad Laboral: It’s physical work. The lever action and material handling require a fair amount of effort.
Essential Design Principles for Stability and Durability
A wobbly frame or a flimsy mold will lead to frustration and failure. These design principles are non-negotiable for a machine that endures repeated stress.
Key Components of a DIY Machine
Every machine, regardless of size, consists of four core systems:
- El Marco: The structural skeleton. It must be absolutely rigid to withstand the downward and lateral forces of the lever. This is the foundation of your machine.
- The Mold Box: The cavity that gives the block its shape. It must be robust, have a smooth interior, and feature a clever design for easy disassembly and block ejection.
- El Mecanismo de Compresión: This includes the lever, the pivot point (fulcrum), and the compression platen that directly presses the mix. Mechanical advantage is key here.
- El Sistema de Eyección: Often an overlooked detail. This can be a simple bottom plate that pushes the block up, or a removable side panel that allows the block to slide out. It must work smoothly to avoid damaging the fragile green block.
Material Selection for Longevity
Choosing the right materials is what separates a lasting tool from a makeshift gadget.
- Material del marco: Steel angle iron (minimum 50mm x 50mm x 3mm thick) is the gold standard. While a heavy hardwood frame is possible, steel’s resistance to warping, splitting, and stress under load makes it superior for long-term durability.
- Mold Interior: The surface finish dictates how easily blocks release. Smooth, oiled steel plate (4-5mm thick) is excellent. For even better release, line the mold with HDPE plastic sheets – concrete barely sticks to it.
- Fasteners: If you are not an experienced welder, a bolted design using high-tensile (Grade 5 or 8) bolts, lock washers, and reinforced gussets is a safe and adjustable alternative. If welding, ensure full-penetration welds on all critical joints.
Safety-First Engineering
This machine creates significant mechanical force. Safety cannot be an afterthought.
- Reinforce Stress Points: Add gussets or triangular braces at all 90-degree joints on the frame, especially where the lever pivot attaches.
- Stable Base: The machine must not rock. Incorporate large feet or bolt it down to a heavy workbench.
- Pinch Point Guarding: The lever pivot and where the lever meets the platen are classic pinch points. Consider adding a simple shield or clearly marking the hazard area with paint.
Step-by-Step Construction Guide
This guide outlines a general build sequence for a basic, effective solid-block machine. Always measure twice and cut once.
Tools and Materials Checklist
Tools You’ll Need:
* Angle grinder with cut-off and grinding discs
* Drill press or heavy-duty hand drill with metal bits
* Welder (MIG/ARC) OR equipment for heavy bolting (large wrenches, tap & die set)
* Measuring tape, square, and marker
* Clamps (C-clamps or locking pliers)
* File and/or bench grinder
Materials List (Sample for a Medium Machine):
* Marco: 50mm x 50mm x 3mm steel angle iron, ~8 meters total.
* Caja de Molde: 5mm thick mild steel plate, cut to size for your desired block dimensions (remember to account for material thickness).
* Compression Platen: 5mm or 10mm steel plate, cut slightly smaller than the mold’s internal dimensions.
* Lever & Pivot: A solid steel rod (20-25mm diameter) for the pivot. A length of heavy-duty steel pipe or solid bar for the lever arm.
* Fasteners: High-tensile bolts, nuts, and washers if bolting.
Building the Frame and Mold Box
- Cut Frame Members: Cut the angle iron to length for the four vertical legs and the horizontal top and bottom braces. A rectangular base footprint (e.g., 60cm x 40cm) provides good stability.
- Assemble the Frame: Clamp everything square. Weld or bolt the frame together securely. Use a square constantly to ensure perfect 90-degree angles. This frame must be a perfect rectangle.
- Fabricate the Mold Box: Weld the steel plate into an open-top box. For easier ejection, design one side or the bottom as removable. A common method is to have the mold walls bolt onto a solid base plate.
Assembling the Lever and Compression System
- Attach the Pivot Point: Weld or bolt two sturdy lugs to the top of the frame to hold the pivot rod. This rod must be perfectly level and securely fastened.
- Build the Compression Platen: This plate should fit inside the mold with about 2-3mm of clearance on all sides. Attach a sturdy connection point (like a forged eye bolt) to its center.
- Connect the Lever: The lever arm attaches to the platen’s connection point via a chain or a rod linkage. The lever then rests on the pivot rod. The longer the lever arm on the side you pull, the greater the mechanical advantage.
Finishing Touches and Calibration
- Add Ejection & Handles: Fit the removable mold panel or bottom plate. Add a handle to the lever arm for better grip.
- Deburr and Protect: Grind down all sharp edges and weld splatter. Apply a coat of anti-rust primer and paint to the frame.
- Test Run: Before using concrete, do a dry run with damp sand. Check the lever action, ensure the platen travels smoothly, and verify the ejection process works cleanly.
Mastering the Block Making Process
The machine is only half the equation. The quality of your blocks depends on your mix and process.
The Perfect Concrete Mix Design
Consistency is king. A general-purpose mix for solid blocks is:
* 1 part Portland cement
* 3 parts sharp, coarse sand (avoid fine, “masonry” sand)
* 1 part small, clean aggregate (e.g., 1/4″ pea gravel)
The water content is critical. Aim for a “damp earth” consistency—the mix should hold its shape when squeezed in your fist without dripping water. Too wet, and blocks slump; too dry, and they won’t bind.
Operation Cycle: From Mix to Curing
- Relleno: Place the mold on a sturdy, flat pallet. Fill it in two stages, tamping down the first layer lightly before adding the second to ensure no voids.
- Compresión: Apply steady, firm pressure on the lever. Don’t “jerk” it. Hold the pressure for a few seconds.
- Expulsión: This is a delicate step. Gently remove the mold sides or activate the ejection plate. Lift the mold straight off the green block, which will now be on your pallet.
- Curing (THE MOST IMPORTANT STEP): Do not let your blocks dry out quickly. Cover them with plastic sheeting or burlap and keep them moist by misting with water for 7-14 days. Slow, moist curing is what allows the cement to reach its full strength. After a day or two, they can be carefully stacked for curing to save space.
Troubleshooting Common Issues
- Blocks Breaking on Ejection: Likely caused by a mix that is too dry, insufficient compression, or a mold that needs lubrication (use a light oil or diesel on steel molds).
- Blocks Lack Strength: The usual culprits are improper curing (letting them dry out), a weak concrete mix (too much sand, not enough cement), or inadequate compression force.
- Uneven Block Height: Caused by inconsistent fill volume or uneven pressure on the lever. Develop a standardized filling and pressing routine.
FAQ: Your Home Made Block Machine Questions Answered
Q1: How much does it cost to build a home made block making machine?
A: With careful sourcing, you can build a robust machine for between $150 and $400. This depends heavily on whether you use new steel, find scrap, or already own the tools. It remains a tiny fraction of the cost of a commercial unit.
Q2: What is the approximate strength of blocks made with a DIY machine?
A: Blocks made with proper mix, compression, and curing are perfectly suitable for non-load-bearing walls, garden beds, sheds, and landscaping features. However, they are not certified for structural foundation work or multi-story load-bearing walls without review by a structural engineer. Always err on the side of caution.
Q3: Can I make interlocking bricks with a homemade design?
A: Yes, but it requires a significantly more complex mold with precise interlocking patterns. We strongly advise mastering standard block production first to understand material behavior and machine operation before attempting this advanced step.
Q4: Is a welded frame absolutely necessary?
A: Not absolutely, but it is preferred. A heavily bolted frame using grade-8 bolts, large washers, and properly designed steel gussets can be very effective and is an excellent option if you lack welding equipment or expertise.
Q5: How many blocks can I make in a day?
A: Manage your expectations. As a solo operator, factoring in mixing time, pressing, and handling, a realistic output is 30 to 50 finished, cured blocks per day. The bottleneck is often curing space and the physical cycle of filling and pressing.
Conclusión
Building your own máquina casera para hacer bloques is a journey that blends practical metalworking with the ancient art of masonry. It’s about more than saving money; it’s about reclaiming the ability to create fundamental building materials from scratch. You’ve learned the mechanics, the critical design principles, and the nuanced process that turns cement, sand, and stone into something solid and lasting.
Remember, success lies in three pillars: a stable, well-built machine, a consistent and properly proportioned concrete mixy elpatient, diligent curing of your blocks. Start simple, prioritize safety at every step, and embrace the learning process. The first block you press will be a triumph.
Ready to start? Subscribe to our workshop newsletter for access to detailed schematic diagrams, cut-lists, and advanced mold design tips to refine your build.
Share your project ideas or questions in the comments below! Have you built something similar? We’d love to see your photos and hear about your experiences.
Once you’ve made your blocks, learn how to build a simple dry-stack garden wall with our next guide.
<