
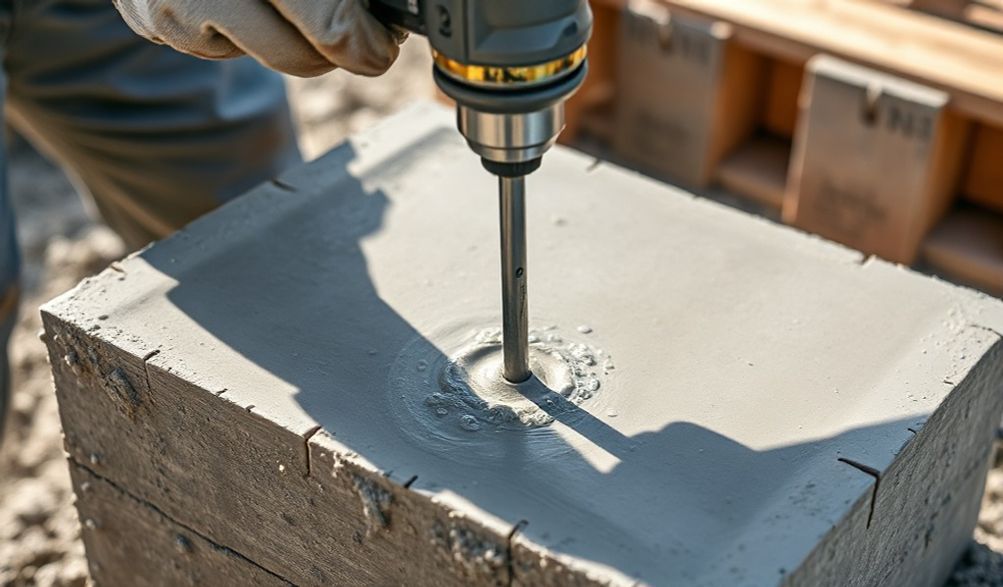
La Guía Definitiva de las Máquinas Vibradoras para Ladrillos: Tipos, Usos y Consejos de Compra
Introducción
Has vertido la mezcla de concreto perfecta en el molde de ladrillo. Las proporciones son exactas, el agregado está limpio y el refuerzo está perfectamente colocado. Pero a medida que la mezcla fragua, surge una sensación de hundimiento. El ladrillo terminado, una vez desmoldado, revela una superficie rugosa y picada, plagada de pequeños agujeros—un defecto conocido como nido de abeja. Esto no es solo un defecto estético; es una debilidad crítica. Para albañiles, contratistas y dedicados constructores aficionados, esta situación es una frustración familiar, que a menudo conduce a materiales desperdiciados, costosas reparaciones y una integridad estructural comprometida.
¿El culpable? Aire atrapado y compactación inadecuada. ¿La solución? Una herramienta tan fundamental como la llana misma: lamáquina de vibración de ladrillos.
Esta guía es su recurso integral sobre este equipo esencial. Basándonos en décadas de conocimiento combinado de la industria, las mejores prácticas del sector y la experiencia directa en obras, hemos recopilado todo lo que necesita saber. Iremos más allá de las definiciones básicas hacia los matices prácticos que diferencian un resultado profesional de uno amateur. Al final de esta guía, no solo comprenderá¿qué?un vibrador de ladrillos es, perocómopara elegir el ideal para su proyecto, operarlo de manera segura y eficaz, y mantenerlo para años de servicio confiable.
Adentrémonos y aseguremos que tu próximo proyecto de mampostería se construya sobre una base de densidad y resistencia perfectas.
¿Qué es una Máquina de Vibración para Ladrillos y Por Qué es Crucial?
En esencia, una máquina de vibración para ladrillos es una herramienta diseñada para consolidar el hormigón fresco colocado en un molde o encofrado. Esto lo logra aplicando vibraciones mecánicas rápidas a la mezcla. Pero para apreciar verdaderamente su valor, es necesario comprender la ciencia que emplea y los beneficios tangibles que ofrece.
La Ciencia de la Compactación del Concreto
Imagina el concreto fresco como un esqueleto granular complejo sostenido en una pasta. Entre estas partículas—el cemento, la arena y el agregado—hay innumerables espacios vacíos llenos de aire atrapado. Si se deja sin alterar, este aire permanece, creando puntos débiles.
La vibración funciona aplicando energía cinética. Esta energía licúa temporalmente la pasta de cemento (el "lubricante"), reduciendo la fricción interna. Esto permite que las partículas sólidas se asienten en una disposición más densa e íntima bajo la fuerza de la gravedad. El aire atrapado, ahora boyante en la mezcla fluidizada, asciende rápidamente a la superficie y escapa. El resultado es una masa homogénea, libre de huecos, que encapsula completamente cualquier refuerzo y se adapta perfectamente a la forma de su molde.
Beneficios Clave de una Vibración Adecuada
El proceso técnico se traduce en ventajas directas y tangibles en el mundo real:
- Maximum Strength & Durability: A fully compacted concrete mix achieves its designed compressive strength. Eliminating voids means there are fewer points for stress concentration, water ingress, or freeze-thaw damage, leading to vastly improved longevity.
- Elimination of Surface Defects: Honeycombing, bug holes, and sand streaks are virtually eliminated, yielding a smooth, dense, professional-grade finish on your bricks or blocks.
- Improved Structural Integrity: The concrete forms a complete, monolithic bond with any steel reinforcement (rebar), ensuring they work together as intended to resist loads and stresses.
- Eficiencia de Materiales: Properly vibrated concrete often requires less material to achieve the same strength specifications, as there is no “dead space” occupied by air.
In short, vibration transforms a loose assemblage of materials into a unified, high-performance building component. It’s not an optional step; it’s the final, critical phase of mixing and placing.
Types of Brick Vibration Machines
Choosing the right type of vibrator is your first critical decision. The best choice depends entirely on your application, scale, and working conditions. Here’s a breakdown of the most common types you’ll encounter.
External or Formwork Vibrators
- Descripción: These units clamp directly onto the exterior of the brick mold or formwork. The vibration is transmitted through the mold walls into the concrete.
- Mejor Para: High-volume, precast production of standardized bricks or blocks in a factory or yard setting. Ideal for repetitive use with the same mold designs.
- Pros:
- Excellent for stiff concrete mixes.
- Doesn’t leave insertion marks on the finished surface.
- Can consolidate multiple molds simultaneously if sized correctly.
- Contras:
- Less effective on complex or deeply profiled molds.
- Requires sturdy, well-sealed formwork to be effective.
- Not practical for on-site, in-situ brickwork.
Internal or Immersion Vibrators (Needle Vibrators)
This is the most versatile and widely used type, especially for on-site work. A vibrating “head” is attached to a flexible drive shaft, which is connected to a power source (motor). The head is immersed directly into the mix.
Sub-types by Drive Mechanism:
- Electric Vibrators: The most common choice for general contractors. They are plug-and-play, relatively quiet, and require minimal auxiliary equipment (just a power source). Modern models are well-insulated for safety. They are the go-to for most small to medium-scale brickwork and foundations.
- Pneumatic (Air) Vibrators: Powered by compressed air, these are the workhorses of wet or hazardous environments. They are inherently explosion-proof, can be submerged, and are often more powerful for their size and weight than electric models. The trade-off is the need for a large, capable air compressor and the associated hose.
- Hydraulic Vibrators: These draw power from a hydraulic system, typically found on heavy machinery. They offer immense power and are incredibly durable. You’ll most often find these as dedicated systems on large, truck-mounted block-making machines or in massive precast plants, not as handheld tools for typical brickwork.
Mejor Para: On-site brick laying, casting columns, filling deep foundations, and virtually any situation where you are placing concrete into forms.
Table Vibrators
- Descripción: The entire casting table or pallet is mounted on a vibrating mechanism. When activated, the vibration is transferred uniformly to every mold on the table.
- Mejor Para: Extremely high-volume production of small, precise precast elements like pavers, tiles, or intricate decorative bricks. Ensures consistent quality across a full batch.
- Pros: Unmatched consistency and speed for repetitive production.
- Contras: High initial cost, inflexible (dedicated to specific table/mold sizes), not portable.
Surface Vibrators (Screed Vibrators)
- Descripción: These sit on the surface of the concrete. A vibrating beam or screed board levels the concrete while providing some degree of compaction from the top down.
- Mejor Para: Preparing a perfectly level and compacted bed for laying bricks (e.g., a slab for paving) or for thin concrete toppings. Not typically used for compacting individual brick molds.
- Pros: Excellent for finishing and light compaction of large, flat areas.
- Contras: Limited compaction depth; only effective for the top several inches.
How to Choose the Right Brick Vibrator: Key Specifications
Once you’ve identified the type, you must dial in the specifications. These aren’t just numbers on a spec sheet; they determine whether the tool will work effectively for your specific concrete and molds.
Amplitude and Frequency: Understanding the Power
These two terms define the “character” of the vibration.
- Frequency is the speed of vibration, measured in vibrations per minute (VPM) or Hertz (Hz). High frequency (10,000+ VPM) is excellent for stiff mixes with small aggregate—common in brick and block production. It fluidizes the paste quickly.
- Amplitude is the “throw” or distance the vibrator head moves during each cycle, measured in millimeters. High amplitude provides more forceful, sweeping action, better for mixes with larger aggregate.
The Rule of Thumb: Use high frequency and low amplitude for stiff, dry mixes (typical in brick molds). Use lower frequency and higher amplitude for flowable mixes with larger stone.
Vibrator Head Diameter and Length
The head must be appropriate for the space you’re compacting.
- Diameter: The head diameter should be roughly 1/4 to 1/3 of the narrowest dimension of the space. For standard brick molds, heads between 25mm (1”) and 40mm (1.5”) are typical. Too large, and it won’t fit or will displace too much material. Too small, and its radius of action is insufficient.
- Length: Ensure the shaft and head are long enough to reach the bottom of your deepest mold or form without submerging the drive motor.
Power Source Considerations
This choice is dictated by your job site logistics.
- Eléctrico: Choose for convenience, lower noise, and where reliable power (110V/230V) is available. Ideal for most residential and small commercial sites.
- Pneumatic: Choose for wet conditions, hazardous atmospheres, or where extreme durability is needed. Requires a significant investment in a quality air compressor.
- Hidráulico You’ll typically “choose” this only when it’s part of a larger equipment package, like a block-making machine.
Durabilidad y Calidad de Construcción
This is where price often reflects longevity. Inspect or research:
- Flexible Shaft: It should be robust, with high-quality wire braiding and a protective outer casing. Kinks are a death sentence.
- Vibrator Head: Look for hardened steel construction, especially at the tip. A sealed, pre-lubricated bearing assembly is crucial.
- Motor Housing: Should be rugged, with proper cooling vents and secure connections.
Step-by-Step Guide to Effective and Safe Operation
A great tool in the wrong hands is ineffective and dangerous. Follow this protocol for optimal results.
Pre-Operation Checklist
Never skip the pre-flight check. Before plugging in or starting up:
1. Inspect the Tool: Check the entire length of the flexible shaft for kinks, cracks, or wear. Ensure the head is securely attached and not damaged.
2. Check Guards & Connections: Ensure all protective guards are in place. Verify power cords or air hoses are in good condition and properly connected.
3. Test Run: Briefly run the vibrator in air before immersing it. Listen for unusual noises (grinding, knocking) and feel for excessive or uneven vibration.
Proper Vibration Technique
Good technique ensures complete compaction without causing segregation (where the heavier aggregate settles away from the paste).
- Insertion: Insert the vibrator head vertically and allow it to descend under its own weight into the concrete.
- Duration: Vibrate at each point until the concrete surface around the head becomes level and glazed with a thin film of paste, air bubbles cease to rise, and a slight settlement is observed. This usually takes 5 to 15 seconds. Over-vibration is destructive and causes segregation.
- Withdrawal: Withdraw the head slowly to allow the cavity to close behind it.
- Spacing: Insert the vibrator at regular intervals, typically 4 to 6 times the head diameter apart. For a 30mm head, insertions should be 120-180mm apart. Always ensure the radius of action overlaps to eliminate dead zones.
Critical Safety Protocols
Concrete work is hazardous. Vibration adds moving parts and energy.
* Personal Protective Equipment (PPE) is Mandatory: Wear steel-toe boots, heavy-duty gloves, safety glasses, and hearing protection. Concrete is abrasive and caustic.
* Beware of Reinforcement: Never let the vibrating head directly contact reinforcing steel, as this can damage both the rebar coating (if any) and the vibrator itself.
* Handle the Shaft with Care: Never use the flexible shaft as a handle or to drag the tool. Keep it as straight as possible during operation to prevent internal damage.
* Lock-Out/Tag-Out: Always disconnect the power source (electrical, pneumatic, hydraulic) before performing any cleaning, adjustment, or maintenance.
Maintenance Tips for Longevity
A brick vibrator is a precision tool. Neglect its care, and it will fail prematurely, often at the worst possible time.
Routine Cleaning Procedures
This is the most important maintenance task. Concrete begins to set inside the head the moment you stop vibrating.
1. Immediately after use, immerse the running head in a bucket of clean water to flush out fresh concrete slurry.
2. Wipe down the flexible shaft with a wet rag before any spillage hardens.
3. Periodically, use a wire brush to remove any stubborn buildup from the head.
Regular Inspection and Parts Replacement
- Weekly/Monthly: Check the head for wear or a “flat spot.” Inspect the shaft casing for cuts or abrasions. Examine the power cable or air hose for damage.
- Annually/Bi-Annually: Consider having a professional service the motor bearings and check internal components, especially for high-use equipment.
Proper Storage
- Never store the vibrator by hanging it from the flexible shaft or by the power cord.
- Coil the flexible shaft in large loops (no tighter than 12 inches in diameter) to prevent permanent kinking.
- Store in a dry, clean place, off the ground.
Frequently Asked Questions (FAQ)
Q1: Can I use a regular concrete vibrator for brick molds?
A: Absolutely. A standard immersion (needle) vibrator is perfect. The key is selecting the right head diameter (typically 25-35mm) to fit within the confines of your brick mold without damaging it.
Q2: How long should I vibrate the concrete in a brick mold?
A: Avoid using time as your metric. Use visual cues: vibrate until air bubbles stop rising, the surface becomes level and glossy with paste, and the concrete visibly settles. Over-vibration, which causes the aggregate and paste to separate, is a more common and serious error than under-vibration.
Q3: What is the most common cause of brick vibrator failure?
A: Improper cleaning is the #1 killer. Allowing concrete to harden inside the head unbalances it, destroying bearings. The second most common cause is physical damage to the flexible shaft from kinking, crushing, or being used as a handle.
Q4: Are pneumatic vibrators better than electric ones?
A: “Better” is situational. Pneumatic vibrators excel in durability, are safe in all weather and hazardous locations, and are often more powerful. However, they require a significant air compressor investment. Electric vibrators offer superior convenience and lower operating costs for most standard job sites. Choose based on your environment and available infrastructure.
Q5: How do I prevent honeycombing in my brickwork?
A: Honeycombing is a direct result of inadequate compaction. To prevent it:
1. Use a workable (but not overly wet) concrete mix design.
2. Employ the proper vibration technique as outlined in this guide.
3. Ensure concrete is placed in the mold in timely layers and vibrated before it begins to stiffen.
4. Check that your formwork is well-sealed to prevent paste leakage.
Conclusión
Achieving professional, durable, and structurally sound brickwork isn’t just about the quality of your cement or the precision of your mold. The final, transformative step is effective compaction, delivered by the right brick vibration machine. From understanding the core science to selecting the ideal type and specifications, proper operation and diligent maintenance are all part of a non-negotiable process.
View this tool not as an expense, but as an investment. An investment that pays dividends in reduced material waste, eliminated rework, and the profound satisfaction of creating masonry that stands the test of time. Before your next project, consult with reputable equipment dealers, cross-reference your concrete mix design requirements, and always, without exception, prioritize safety on site.
We’d love to hear from you. Have a vibration tip or a hard-learned lesson from the job site? Share your experience in the comments below to help fellow craftsmen.
Descargo de responsabilidad: Always follow the manufacturer’s operating manual for your specific equipment. This guide is for informational purposes based on general industry practices.
<