
The Ultimate Guide to Using an 8x8x16 Concrete Block Mold: DIY Tips & Professional Insights
परिचय
The humble concrete block is the unsung hero of the built environment. From the foundation of your garden shed to the retaining wall holding back a hillside, the standard 8x8x16 concrete block is a marvel of modular, durable, and cost-effective construction. Its uniformity is its superpower, allowing for strong, predictable, and scalable projects. But what if you could move beyond simply being a consumer of these building blocks? What if you could become their creator?
Purchasing pre-made blocks is convenient, but it comes with significant costs and limitations. For any project requiring more than a handful of blocks, the expense adds up quickly. Furthermore, you’re locked into standard colors and textures. This is where the DIY path shines. By using an 8x8x16 कंक्रीट ब्लॉक मोल्ड, you unlock substantial cost savings, complete control over your material’s composition and finish, and the profound satisfaction of building something from the literal ground up.
This guide is designed to be your comprehensive manual for mastering this essential tool. Whether you’re a homeowner embarking on a landscaping project, a hobbyist looking to expand your skillset, or a small-scale builder seeking greater control over material costs, the process is within your reach. The information here is built on a foundation of material science principles, established industry best practices, and hard-won, practical experience. Our goal is to ensure your foray into block-making is not only successful but also safe and efficient.
We’ll walk you through everything: from understanding why the 8x8x16 size is so important, to choosing the perfect mold, following a detailed step-by-step casting process, and applying pro-level tips for flawless results. Let’s build your knowledge, so you can build anything.
Understanding the 8x8x16 Concrete Block Standard
Before you pour a single pound of concrete, it’s crucial to understand the “why” behind the dimensions. This isn’t an arbitrary size; it’s a carefully engineered standard that makes modern construction efficient.
Why This Size is Industry Standard
The key concept here is the difference between nominalऔरवास्तविक size.
* Nominal Size: 8 inches by 8 inches by 16 inches. This is the name we use for planning and description.
* Actual Size: Typically 7.625″ x 7.625″ x 15.625″. The 3/8-inch difference on each side is designed to accommodate a standard mortar joint.
This system creates a perfect modular grid. When you account for the mortar, each block course is exactly 8 inches tall. This allows for:
* Consistent Coursing: Walls rise in predictable, even increments.
* Simplified Calculations: Builders can easily calculate the number of blocks needed for a wall of any given height or length.
* Structural Predictability: Engineers rely on these uniform dimensions for load-bearing calculations.
Your 8x8x16 कंक्रीट ब्लॉक मोल्ड is engineered to produce blocks with these precise actual dimensions, ensuring anything you build integrates seamlessly with standard construction practices.
Common Projects for 8x8x16 Blocks
The versatility of this block size is immense. With the ability to make your own, these projects become more affordable and customizable:
* Retaining Walls: Perfect for creating terraced gardens or holding back soil on sloped properties.
* Foundations: A stable, frost-resistant base for sheds, garages, workshops, or small cabins.
* Landscaping Features: Build raised garden beds, sturdy planters, or elegant seat walls.
* Outdoor Living: Construct fire pits, barbecue bases, or pillars for pergolas.
* Structural Walls: For garden walls, partition walls, or even small building walls when properly engineered and reinforced.
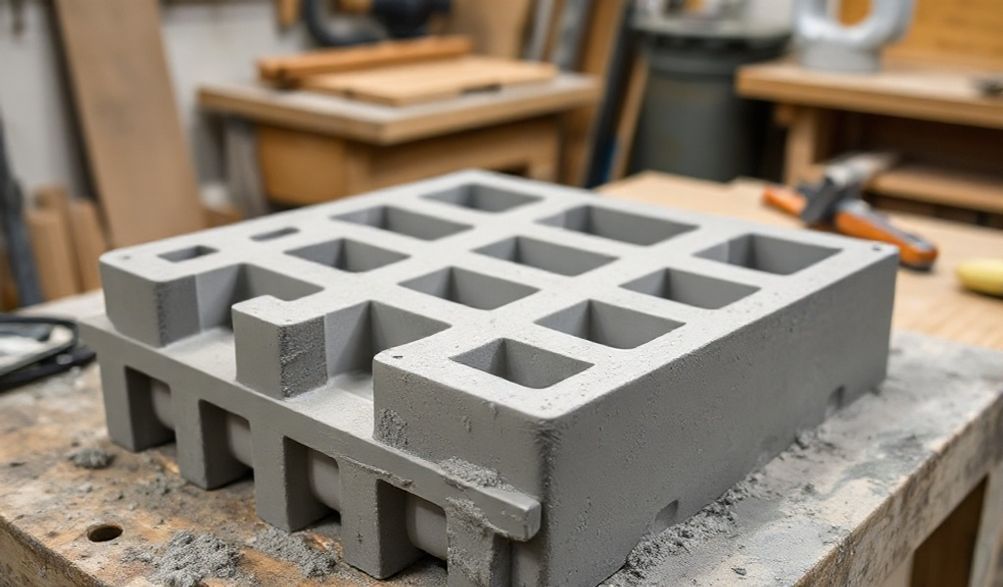
A Quick Note on Design: Blocks can be solid or have hollow cores. Hollow-core blocks are lighter, use less material, and their voids are essential for vertical rebar and grout in reinforced structural walls. Many molds offer inserts to create these cores.
Choosing the Right 8x8x16 Block Mold for Your Project
Not all molds are created equal. Your choice will impact the block quality, your efficiency, and the mold’s lifespan.
Types of Molds: From DIY to Professional
-
Single-Use Plastic Molds (Often “Bagged” Molds):
- सर्वोत्तम: A one-time, very small project where buying a reusable mold isn’t justified.
- फायदे: Extremely low upfront cost, simple.
- नुकसान: Flimsy, often produce blocks with rougher finishes, and are not eco-friendly or cost-effective for more than a few blocks.
-
Reusable ABS/Polypropylene Plastic Molds:
- सर्वोत्तम: The vast majority of DIYers and small-scale projects. This is the highly recommended starting point.
- फायदे: Excellent balance of cost, durability, and performance. They feature good release properties (concrete doesn’t stick as easily), are relatively lightweight, and can produce hundreds of blocks if cared for. They often come with interlocking assembly systems.
- नुकसान: Can warp if left in direct sun or abused. Not suitable for the high-volume use of a commercial operation.
-
Steel Molds (Often Vibrating Table Molds):
- सर्वोत्तम: Professional use, production yards, or the extremely serious DIYer making thousands of blocks.
- फायदे: Extremely durable, precise, and often designed to work with a vibrating table for perfect compaction. They withstand immense wear and tear.
- नुकसान: Very high initial cost, heavy, and require more maintenance (rust prevention).
Key Features to Look For in a Reusable Mold
When shopping for a reusable plastic 8x8x16 कंक्रीट ब्लॉक मोल्ड, prioritize these features:
* Material Thickness & Rigidity: Look for thick walls (4-5mm+) that won’t flex or bulge when filled with heavy, wet concrete.
* Ease of Assembly: Interlocking pins, cam locks, or bolt systems that allow for quick setup and breakdown without tools are a huge time-saver.
* Reinforced Corners/Edges: High-stress areas should be beefed up to prevent cracking.
* Hollow Core Inserts (Optional): If you plan on any structural work requiring rebar, ensure the mold includes the plastic forms to create the standard two or three voids in the block.
Step-by-Step Guide: Casting Blocks with Your Mold
Here is the core process, broken down into manageable, sequential steps. Patience and attention to detail here are what separate crumbly, amateurish blocks from professional-grade ones.
Step 1: Safety First & Preparation
Concrete work is rewarding but demands respect. Never skip preparation.
* Personal Protective Equipment (PPE) is Non-Negotiable:
* Safety Glasses: Protect your eyes from cement dust and splashes.
* Gloves: Cement is caustic and can burn skin; wear durable, waterproof gloves.
* Dust Mask/Respirator: A simple N95 mask is essential when handling dry Portland cement to avoid inhaling fine silica dust.
* Sturdy Boots and Long Pants.
* Workspace Setup: Choose a perfectly level and stable surface—a sturdy workbench or a flat section of concrete slab is ideal. Cover the area with plastic sheeting for dramatically easier cleanup.
* Preparing the Mold: Assemble your mold according to the manufacturer’s instructions. Then, apply a mold release agent. A commercial spray release agent is best, but a light, even spray of vegetable oil or a wipe-down with motor oil will work in a pinch. This step is critical for a clean demolding.
Step 2: Mixing the Perfect Concrete
The bagged “concrete mix” from your hardware store is convenient for setting posts, but for durable blocks, a custom mix is superior.
* Recommended Mix Design: A strong, low-slump (stiff) mix is key. A common and effective ratio is:
* 1 part Portland Cement (Type I/II)
* 2.5 parts Sharp Sand (coarse, gritty masonry sand, not soft play sand)
* 3 parts 3/8″ Gravel (clean, crushed stone or pea gravel)
* Mixing Process: Always add water to your dry mix, not vice-versa. Use clean water. Mix thoroughly until all ingredients are uniformly distributed and the mix is cohesive.
* For Volume: A rented mortar mixer or a sturdy electric paddle mixer in a wheelbarrow is a back-saver.
* For Small Batches: A mixing hoe in a wheelbarrow or tub works but is labor-intensive.
* Expert Tip: The “Ball Test”: Grab a handful of mixed concrete and squeeze it into a ball in your gloved hand. It should hold its shape without slumping, and your glove should be left with a slight sheen of moisture, but no free water should drip out. If it crumbles, it’s too dry. If it’s soupy, it’s too wet.
Step 3: Filling, Compacting, and Finishing
This is where the block takes shape. Work methodically.
1. भराई Shovel your mix into the mold in 2-3 layers. Do not dump it all in at once.
2. Compaction – The MOST Critical Step: After each layer, you must compact the concrete to eliminate air pockets, which are the primary cause of weak, pitted blocks.
* Use a homemade tamper (a block of wood on a handle) to firmly press the concrete into the corners.
* For superior results, tap the sides of the mold vigorously with a rubber mallet throughout the filling process. In professional settings, a vibrating table is used for this purpose.
3. Finishing: Once the mold is overfilled and fully compacted, use a straight piece of wood or metal (a “screed”) to scrape off the excess concrete, moving it in a sawing motion across the top of the mold to create a perfectly flat surface.
Step 4: Curing for Maximum Strength
Pouring the concrete gives it form; curing gives it strength. Curing is the process of maintaining adequate moisture for the chemical reaction (hydration) to complete.
* Initial Set: Let the filled mold sit undisturbed on a level surface for about 24 hours. Avoid direct sun and wind which can dry it out too quickly.
* डीमोल्डिंग: After 24 hours, carefully disassemble the mold. If the concrete is still soft or mars easily, give it more time. Gentle tapping can help release it.
* The Curing Process: Once demolded, the blocks are still very weak. They must be kept moist for at least 7 days.
* The best method: stack them in a shaded area, cover them with plastic sheeting, and lightly spray them with water daily.
* The 28-Day Rule: Concrete reaches its design strength at 28 days. While it’s hard enough to build with after a week, for any load-bearing application (like a foundation or tall wall), waiting the full 28 days is a wise practice of patience.
Pro Tips & Troubleshooting for Flawless Blocks
Achieving a Smooth Finish & Easy Release
- Cleanliness is Key: After each use, clean every nook and cranny of your mold with water and a brush before concrete residue hardens.
- Fine-Tune Moisture: In my experience, erring on the side of a slightly drier mix (passing the ball test) leads to faster demolding times and fewer surface defects than a wet, soupy mix.
- Gentle Demolding: Never force or pry a block out. If it’s sticking, tap the sides of the mold gently with a rubber mallet on all sides to break the suction.
Solving Common Problems
- Problem: Blocks breaking during demolding.
- Solution: Likely insufficient curing time (demolded too early), inadequate compaction, or you forgot the release agent.
- Problem: Surface pitting or “honeycombing” (rock pockets visible).
- Solution: This is almost always a compaction issue. You didn’t vibrate or tamp enough to consolidate the mix and bring cement paste to the surface.
- Problem: Blocks cracking a few days after casting.
- Solution: Usually caused by rapid drying. You didn’t keep them covered and moist during the critical first-week cure. It can also be a mix that is too rich in cement, causing excessive shrinkage.
Beyond the Basics: Advanced Techniques
Once you’ve mastered standard gray blocks, a world of customization opens up.
Adding Color and Texture
- Integral Color: Add liquid or powder concrete pigments to your dry mix before adding water. This colors the entire block uniformly and is fade-resistant.
- Exposed Aggregate or Rock-Face Finish: You can achieve a decorative, stone-like finish by:
- Using a special mold liner with a textured pattern.
- Brushing a surface retarder onto the mold’s interior before pouring. After demolding, you wash away the surface cement to reveal the aggregate beneath.
Incorporating Reinforcement
- For Structural Walls: This is where hollow-core blocks are essential. When laying the blocks, you ensure the voids align vertically. You then place rebar down these continuous voids and fill them with a soupy, fine-aggregate grout, creating a reinforced concrete column within the wall.
- Fiber Mesh: For added crack resistance and tensile strength, you can mix synthetic or steel fibers directly into your concrete batch. This is particularly useful for blocks that might experience ground movement or thermal stress.
FAQ Section
Q1: How many blocks can I make with one mold?
ए: A quality reusable plastic 8x8x16 कंक्रीट ब्लॉक मोल्ड can easily produce hundreds of blocks over its lifetime if properly cleaned and stored. Remember, it’s a batch process: you make one (or a pair, with some molds) at a time, then reuse the mold for the next batch.
Q2: What’s the cost comparison: making vs. buying 8x8x16 blocks?
ए: Making your own blocks yields significant savings, especially for projects requiring 50+ blocks. While a reusable mold is an upfront cost (~$50-$150), the raw materials (cement, sand, gravel) are cheap in bulk. A homemade block often costs 30-50% less than a store-bought one. The savings multiply with project size and mold reuse.
Q3: Can I use Quikrete or regular concrete mix from the bag?
ए: You can, but it’s not ideal for quality block making. Bagged mixes are designed for ease of use, often with a higher cement content and finer aggregates. This can lead to increased shrinkage cracking, higher cost per block, and a less durable final product. A custom mix with proper aggregate is strongly recommended.
Q4: How long do I need to wait before using the blocks in a wall?
ए: Minimum curing times are crucial:
* Non-Structural (Planters, Decorative Walls): 7 days of moist curing.
* Load-Bearing (Foundations, Retaining Walls): A full 28-day cure is strongly advised to ensure the blocks have reached their necessary compressive strength before being loaded.
Q5: How do I store and clean my concrete block mold?
ए:
* Clean: Immediately after demolding, use a hose and a stiff brush to remove all wet concrete residue before it cures.
* Store: Disassemble the mold if possible. Store it flat, in a shaded, dry place. Prolonged exposure to direct sunlight can warp and degrade plastic molds.
निष्कर्ष
Embarking on the journey of making your own concrete blocks with an 8x8x16 कंक्रीट ब्लॉक मोल्ड is more than a cost-saving measure; it’s an exercise in empowerment and craftsmanship. You gain complete control over a fundamental building material, transforming raw ingredients into durable, functional components for your vision.
Success, as we’ve outlined, hinges on respecting the process: choosing the right tool for the job, understanding the science of your mix, mastering the technique of compaction, and practicing the patience required for proper curing. This guide, rooted in established material expertise and practical experience, provides the roadmap.
The skill of block-making is a rewarding addition to any DIYer’s or tradesperson’s repertoire, adding tangible value to your property and capabilities. Start with a small, manageable project like a garden planter to build your confidence. We encourage you to share your results and ask questions as you learn.
Now, you’re ready to move from buying blocks to building with your own.
<