
How to Make a Concrete Block Machine: A Step-by-Step DIY Guide
Have you ever looked at a garden wall, a shed foundation, or a small outbuilding and thought about building it yourself with concrete blocks? The idea is solid, but the cost of commercial block-making machinery can quickly turn that dream into a daunting expense. What if you could build the machine that builds the blocks?
Drawing from years of hands-on experience in small-scale construction and mechanical fabrication, this guide is designed for the determined DIYer. We’ll demystify the process of building a functional, manual concrete block machine. This isn’t about industrial output; it’s about empowerment, self-sufficiency, and achieving professional-looking results on a homesteader’s or hobbyist’s budget.
This comprehensive, 1500+ word guide is crafted for the practical builder. We’ll move from core principles to a detailed materials list, through step-by-step assembly, and into operation—all while placing a paramount emphasis on safety and achievable results. Let’s build the tool that will help you build everything else.
Understanding the Mechanics of a Block Machine
Before we cut any steel or strike an arc, it’s crucial to understand what we’re building. A concrete block machine is a simple yet clever device that uses mechanical force to form and eject a dense, consistent block. Knowing how it works informs how you build it.
Core Components and How They Work
Every manual block machine, from the simplest to the most complex, relies on three core subsystems:
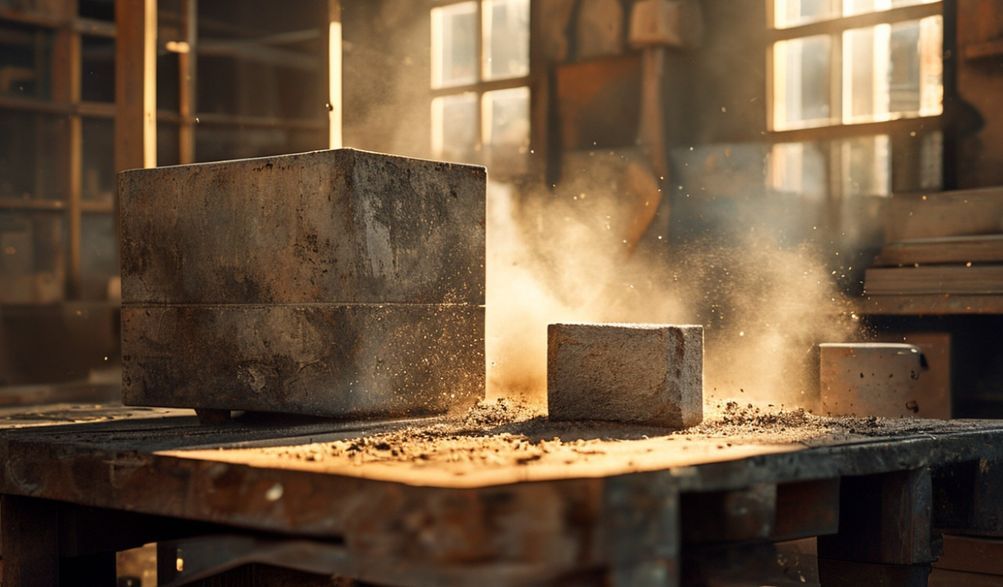
- The Mold (Cavity): This is a steel box that defines the shape and size of your block (e.g., a standard 8″x8″x16″ hollow core block). Its interior finish and geometry are critical for releasing the cured block.
- The Tamper/Compactor: This is a heavy plate that fits precisely inside the mold cavity. When force is applied (via a lever), it compresses the wet concrete mix, removing air pockets and creating a dense, strong block.
- The Ejection System: After compaction, you need to remove the fresh block without damaging it. This is typically a bottom plate that pushes the block up and out of the mold, often assisted by springs or a secondary lever.
Our guide focuses on a manual lever-operated system. This design provides excellent mechanical advantage without the cost and complexity of hydraulics, making it ideal for a first-time build.
Key Design Principles for Success
Three principles will make the difference between a frustrating prototype and a reliable tool:
- Compaction is King: The strength of a concrete block comes from low water content and high compaction. Your machine must be rigid enough to allow you to apply significant, repeated pressure without flexing.
- The Magic of Taper (Draft): A mold with perfectly vertical sides will trap the block. You must design the mold with a slight taper—wider at the top than the bottom. This 1-2 degree draft allows the block to release cleanly.
- Build for Abuse: This machine will be subjected to repeated impact, vibration, and heavy loads. Overbuild your frame and connections. A wobbly machine produces poor blocks and is a safety hazard.
Tools and Materials Required
Transparency is key to a trustworthy DIY guide. Here is the complete checklist you’ll need to gather. Accuracy in sourcing these materials will directly impact your build’s success.
Essential Materials List
Your material cost will vary, but sourcing from a local steel supplier or scrapyard can keep it budget-friendly.
- Steel Plate (1/4″ or 6mm thick): For fabricating the mold box walls and the tamper head. You’ll need roughly a 2’x4′ sheet.
- Square/Rectangular Steel Tubing (2″x2″x1/8″ or 50x50x3mm): For building the rigid main frame and lever arms. This is the skeleton of your machine.
- Flat Bar (1″x1/4″ or 25x6mm): For bracing, brackets, and creating the lever pivot points.
- Hardware: High-tensile bolts, nuts, and washers (sizes: 1/2″ and 3/8″ are common). Several hinge pins or hardened steel rods for pivot points.
- Springs: 2-4 heavy-duty compression springs for the ejection plate return mechanism.
- Miscellaneous: Grease fittings (zerks), high-strength lubricant, and rust-inhibiting paint.
Necessary Tools for Fabrication
This is an intermediate metalworking project. Having the right tools is non-negotiable.
- Welder: A MIG welder is ideal for this thickness of material, but a capable stick (ARC) welder will work. You must be able to produce strong, penetrating welds.
- Angle Grinder: Equipped with both cutting and grinding/flap discs.
- Metal Cutting Saw: A chop saw with an abrasive blade or a bandsaw for making accurate, square cuts.
- Drill Press or Heavy-Duty Drill: For drilling precise holes for bolts and pivot pins. A drill press is highly recommended.
- Measuring & Layout: Tape measure, combination square, speed square, marker, and center punch.
- Clamps: Multiple C-clamps or locking pliers to hold components in place for welding.
⚠️ CRITICAL SAFETY DISCLAIMER:
Proper skill in welding, metal fabrication, and the use of power tools is required for this project. If you are not experienced, consult with or hire a professional. Always wear appropriate Personal Protective Equipment (PPE): welding helmet, safety goggles, heavy gloves, hearing protection, and sturdy boots. Safety is the first component you must install.
Step-by-Step Assembly Instructions
Now, we put theory into practice. Follow these steps in order, checking alignment as you go.
Step 1: Building the Main Frame and Lever Mechanism
The frame is the foundation. It must be massively strong and square.
- Cut your square tubing to create a rectangular base frame. Dimensions around 24″ wide by 36″ long are a good starting point for stability.
- Weld the base frame together, ensuring perfect 90-degree angles. Add cross-bracing in the center if needed.
- Cut and weld two vertical uprights at the back of the base frame. These will support the main lever pivot point at a height of about 48-54 inches.
- Fabricate the main lever arm from a long piece of tubing (5-6 feet). Attach a pivot point (using a bolt or pin through flat bar brackets) between the two uprights. The lever should move freely.
Step 2: Fabricating the Mold Box
This is the heart of the machine, where precision matters most.
- From your steel plate, cut four pieces to form the walls of your block. For an 8″x8″x16″ block, you’ll need two pieces at 8″ tall x 16″ long (sides) and two at 8″ tall x ~7.5″ long (ends). Crucially, cut these with a slight taper (1-2 degrees) so the top opening is slightly larger than the bottom.
- To create hollow cores, you’ll need “cores.” Weld together small boxes or use solid steel bars (with taper) and suspend them in the center of the mold cavity during assembly. They must be securely fastened to the top of the mold box.
- Carefully weld the four wall plates together, maintaining the taper and ensuring all interior corners are square and smooth. Grind all interior welds flush.
- Weld a robust flange or mounting bracket to the top outside of the mold box. This will allow you to bolt the entire mold securely to the main frame of the machine.
Step 3: Creating the Tamper Head and Ejection Plate
These are the moving parts that interact directly with the concrete.
- Tamper Head: Cut a steel plate to match the internal dimensions of the mold at its bottom (the smaller end). Weld a sturdy stem or crossbar to its top. This stem will connect to the main lever arm, transferring the compaction force.
- Ejection Plate: This is the “floor” of the mold during filling. Cut another plate to fit snugly inside the mold. Weld guides or rods to its bottom that will slide through holes in the machine’s base.
- Ejection Mechanism: Attach heavy-duty springs around the guide rods, between the ejection plate and the machine base. This will automatically retract the plate after ejection. Alternatively, design a second, smaller lever to manually lift the plate.
Step 4: Final Assembly and Adjustments
Bring all the subsystems together into a cohesive machine.
- Bolt the completed mold box securely to the main frame, centered under the lever arm’s path.
- Connect the tamper head stem to the lever arm with a pivot pin. The tamper should slide freely into the mold without binding.
- Insert the ejection plate assembly from below, ensuring it sits flush at the bottom of the mold.
- Cycle the machine without concrete. Check for smooth operation. Identify any friction points and grind or adjust. Install grease fittings on all pivot points.
Operating Your Homemade Block Machine
Building it is half the battle. Using it correctly yields the prize: strong, usable blocks.
Preparing the Right Concrete Mix
The machine is only as good as the mix you feed it. A standard block mix is drier than typical poured concrete.
- A Reliable Ratio: 1 part Portland cement, 3 parts sharp/concrete sand, 1 part 10mm (3/8″) gravel or crushed stone.
- Moisture is Key: Add water slowly. The perfect mix should hold together in a ball when squeezed in your hand but leave no free water on the surface—”like damp sand.”
- Consistency: Mix thoroughly for uniform color and texture. Inconsistent mix leads to weak spots.
The Block-Making Process: A Cycle
Establish a rhythmic workflow for efficiency.
- Prepare: Lightly oil the interior mold walls and tamper head with a concrete release agent (used motor oil is common but not ideal; a commercial release agent is better).
- Fill: Place the ejection plate in the “up” position, closing the mold bottom. Shovel in your mix, slightly overfilling each cavity.
- Compact: Pull down the main lever with firm, repeated strokes (3-5 times) to fully compress the mix. You should see the tamper head settle.
- Strike Off: Use a straight edge to scrape excess mix flush with the top of the mold.
- Eject: Engage the ejection mechanism. The plate will lift the fresh block up and out of the mold.
- Cure: Gently transfer the “green” block onto a flat, covered pallet. Keep it moist and out of direct sun/wind for at least 3-7 days for proper curing strength.
Troubleshooting Common Issues
- Blocks Breaking on Ejection: The mold likely lacks sufficient taper or has rough interior welds. Remedy: Grind interior smooth and ensure draft angle.
- Blocks Lack Strength: Insufficient compaction or too much water in the mix. Remedy: Apply more lever strokes and reduce water content.
- Machine Binds or Sticks: Misalignment or concrete buildup. Remedy: Check all pivot points for alignment, clean the machine meticulously after each use, and ensure consistent lubrication.
Important Safety and Maintenance Warnings
This section is not an afterthought. It is the most important part of this guide, reflecting the responsibility that comes with building your own equipment.
Non-Negotiable Safety Practices
- Lifting: Fresh concrete blocks are extremely heavy (35-40 lbs). Use proper lifting technique and get help.
- Pinch Points: Never place hands, fingers, or any body part under the tamper head or lever mechanism while it is under tension or during operation.
- PPE is Permanent: Wear safety glasses when handling concrete or metal. Wear a mask when mixing dry cement or grinding. Wear gloves always.
Maintaining Your Machine for Longevity
A little care prevents major headaches.
- Clean Immediately: After each session, use water and a brush to remove all wet concrete slurry from the mold, tamper, and plate. Once it hardens, it’s incredibly difficult to remove.
- Inspect Regularly: Before each use, check critical welds for cracks. Ensure all bolts are tight and pivot points are secure.
- Fight Rust: After cleaning and drying, apply a light oil to all steel surfaces. Consider painting non-wearing parts of the frame with a quality enamel paint.
Frequently Asked Questions (FAQ)
Q1: How strong are blocks made with a homemade machine compared to commercial ones?
A: With optimal mix design, thorough compaction, and proper wet curing, blocks from a well-built manual machine can achieve compressive strengths suitable for many non-structural applications like garden walls, planters, or shed bases. However, they are unlikely to consistently meet formal ASTM or engineering standards required for load-bearing foundation walls without professional mix design and validation.
Q2: What is the approximate cost to build this vs. buying a machine?
A: You can build a robust manual machine for $200 – $500 in materials, depending on local steel prices and scavenging success. A new, basic commercial manual block machine typically starts around $1,000 – $2,500. The DIY trade-off is clear: significant cost savings in exchange for your time, labor, and required fabrication skills.
Q3: Can I modify the mold to make different block sizes or shapes?
A: Absolutely. The principle remains the same. You can build interchangeable mold boxes for different sizes (e.g., 4″ thick blocks) or create a multi-cavity mold for producing several smaller pavers or bricks in one cycle. Design with the same principles: strength, taper, and smooth interiors.
Q4: Is this project suitable for a beginner with no welding experience?
A: No. This is an intermediate-to-advanced project. The forces involved demand strong, safe welds and precise fabrication. Attempting this without foundational metalworking skills is unsafe and likely to result in a failed, frustrating build. We strongly recommend gaining basic welding competency first through a course or apprenticeship, or partnering with an experienced fabricator.
Conclusion
Building your own concrete block machine is a profound exercise in self-reliance. It takes you from understanding fundamental mechanics, through the discipline of fabrication, and finally to the tangible result of creating your own building materials. It’s a project that rewards patience, precision, and respect for the tools and materials.
This guide is rooted in practical experience and a firm commitment to safe practice. The empowerment of building your own tools is incredibly rewarding, but it must always be balanced with a sober respect for the forces and hazards involved.
If you’re ready to begin, start not at the welder, but at the drawing board. Sketch your design, double-check your measurements, and source your materials. For those seeking even more detail, consider consulting professional fabrication blueprints or engineering resources. Plan meticulously, build safely, and you’ll create not just a machine, but a cornerstone for countless future projects.
Final Disclosure: This guide is for informational and educational purposes only. The design, construction, and safe operation of any homemade equipment are the sole responsibility of the builder. Always prioritize safety and consult professionals when in doubt.