Phase 1: Foundational Preparation – Material Science and Site Readiness
Successful brick manufacturing begins long before the machine is powered on. This phase sets the stage for all subsequent operations.
- Raw Material Selection and Sourcing
- The process starts with procuring the correct raw materials. For concrete bricks, this typically involves:
- 집계체 Sand, gravel, or crushed stone. They must be clean, hard, and durable. Particle size distribution (grading) is critical; a well-graded mix of coarse and fine aggregates packs more efficiently, requiring less binder.
- Binder: Primarily Portland cement. The grade and type (e.g., OPC, PPC) will affect setting time and final strength.
- 물: Clean, potable water free from impurities, oils, or organic matter.
- For alternative products like fly ash or compressed earth blocks, the primary material (fly ash or specific soil) must be tested for suitability.
- The process starts with procuring the correct raw materials. For concrete bricks, this typically involves:
- Mix Design and Proportioning
- This is the “recipe” and is paramount for quality. A standard mix for concrete blocks might be in the ratio of 1 part cement : 4-6 parts combined aggregates by volume, but precise designs are based on the desired compressive strength (e.g., 7 MPa, 15 MPa). The water-cement ratio is crucial; too little water hinders hydration, too much weakens the final product and causes handling issues. Advanced operations use weight batching for precision, moving beyond volumetric measurements.
- Material Pre-Processing
- Raw aggregates may require crushing and screening to achieve the correct size distribution. All materials must be stored properly: aggregates in segregated, clean stockpiles; cement in a completely dry, waterproof silo or warehouse to prevent pre-hydration and caking.
Phase 2: The Core Production Cycle – Machine Operation
This phase encompasses the dynamic interaction between the prepared mix and the machinery.
- Step 1: Mixing – Achieving Homogeneity
- The raw materials are combined in a mechanical mixer. A pan mixer또는twin-shaft paddle mixer is standard for consistent, thorough blending. The sequence is important: first, blend dry aggregates, then add cement and mix dry, and finally, add the calculated amount of water gradually. Mixing continues until a uniform, cohesive, yet relatively stiff (low-slump) consistency is achieved. This usually takes 3-5 minutes. The mix should hold its shape when squeezed in the hand without excess water leaching out.
- Step 2: Feeding and Metering
- The mixed material is transferred to the brick machine’s feed hopper, often via a conveyor or elevator. Inside the machine, a volumetric feeder (a feed box or drawer) moves across the empty mold cavity, depositing a precise, predetermined volume of mix. The accuracy of this metering directly controls the weight and height of the final brick.
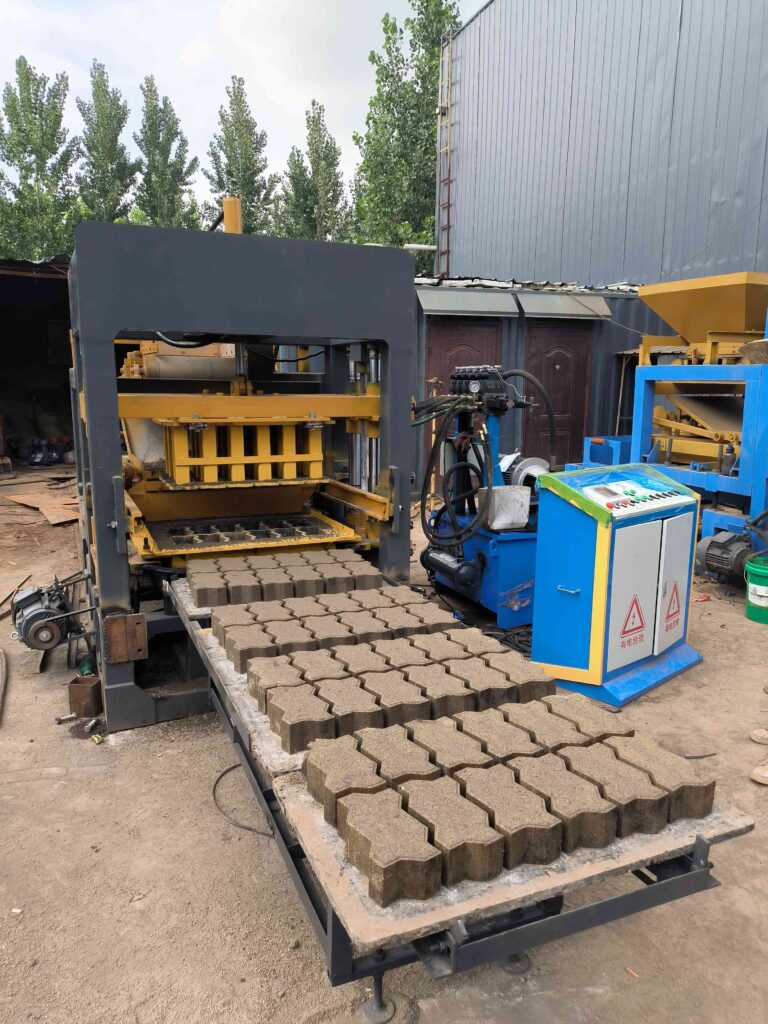
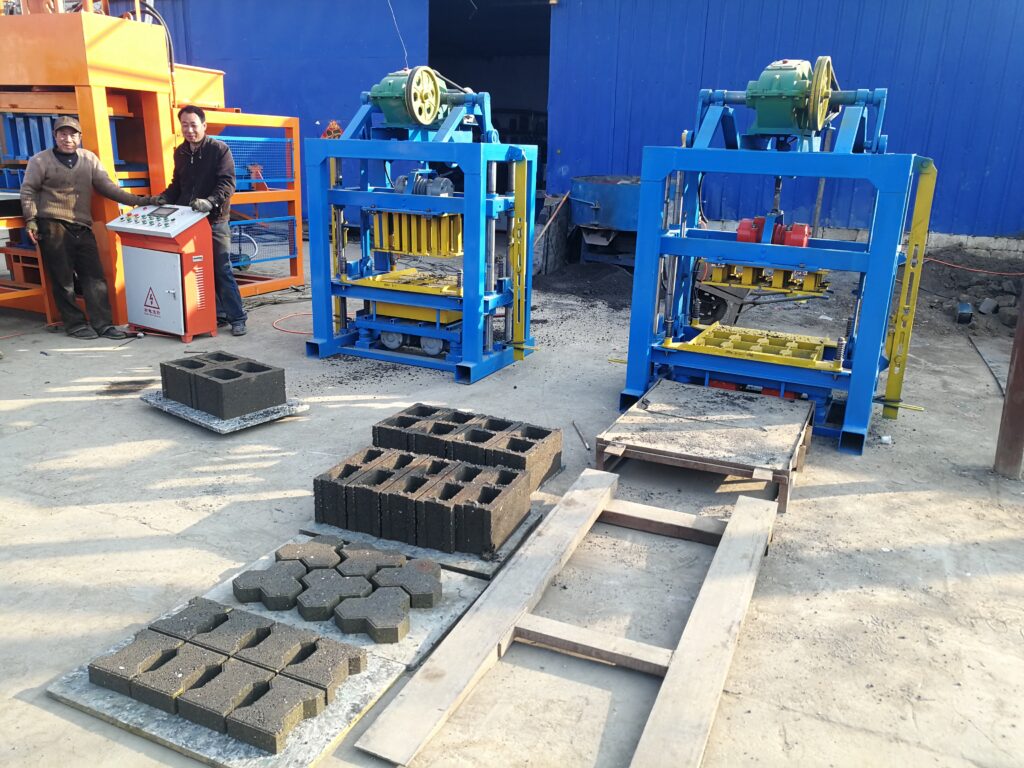
- Step 3: Compaction and Forming – The Heart of the Process
- This is where the machine’s core technology activates. The filled mold is subjected to immense pressure.
- In a vibration-compaction machine, high-frequency vibrators attached to the mold table energize the particles, allowing them to settle densely. Simultaneously, a hydraulic press head descends to apply top pressure, shaping the brick.
- In a pure hydraulic press, high-pressure cylinders drive a ram directly into the mold, compacting the material through sheer force.
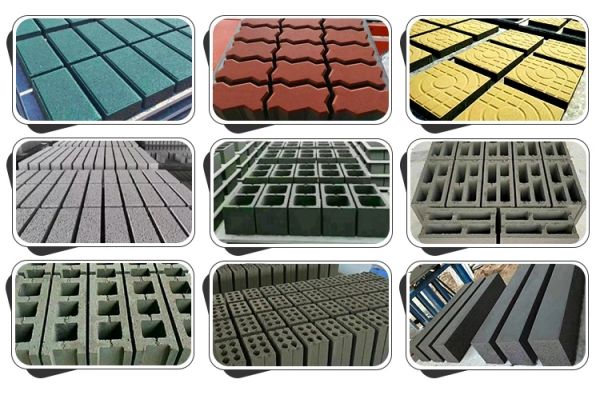
- The pressure is held for a brief “dwell time” to ensure the compaction is complete and air is expelled. The mold itself—a precision steel cavity—gives the brick its shape (solid, hollow, interlocking).
- This is where the machine’s core technology activates. The filled mold is subjected to immense pressure.
- Step 4: Ejection and Handling
- After compaction, the mold opens or lifts, and an ejection plate pushes the newly formed “green” brick up and out of the mold. In automated systems, the brick is immediately transferred onto a steel or wooden pallet. A conveyor system then moves the palletized brick out of the press area. The machine resets, and the cycle repeats automatically.
Phase 3: The Critical Curing Process – Developing Strength
The brick is formed but not finished. Curing is the controlled process that allows it to gain its designed strength and durability.
- Initial Setting and Demolding Strength
- The green brick must be handled with care immediately after ejection. It has enough “demolding strength” to hold its shape but is still very fragile. They are carefully stacked on curing racks or carts, often still on their pallets.
- Moist Curing – The Standard Method
- For cement-based bricks, strength develops through a chemical reaction called 수분 보충, which requires moisture. The stacked bricks are moved to a curing chamber or covered yard. They are kept continuously moist for a minimum period, typically 7 to 14 days. This is achieved by:
- Water Spraying: Regular, automated misting or manual spraying.
- Covering: Using water-saturated burlap or plastic sheeting to trap moisture.
- Steam Curing: For accelerated strength gain (common with fly ash bricks), bricks are placed in a chamber where steam at 60-80°C is applied for 18-24 hours, allowing them to gain most of their strength in a single day.
- For cement-based bricks, strength develops through a chemical reaction called 수분 보충, which requires moisture. The stacked bricks are moved to a curing chamber or covered yard. They are kept continuously moist for a minimum period, typically 7 to 14 days. This is achieved by:
- Drying and Final Hardening
- After the moist curing period, bricks are allowed to dry slowly and evenly in a shaded, well-ventilated area. Rapid drying can cause cracking. The bricks continue to gain strength over weeks and months, though they are typically ready for sale and use after 28 days, when they approach their design strength.
Phase 4: Quality Control and Post-Production
Ensuring consistency and preparing the product for market are the final steps.
- In-Process Quality Checks
- Throughout the production run, the operator must perform regular checks:
- Visual Inspection: For surface defects, cracks, or chips.
- Dimensional Checks: Using calipers to ensure length, width, and height are within tolerance.
- Weight Checks: Randomly weighing bricks to verify mix consistency and feed accuracy.
- Compressive Strength Testing: Using a laboratory compression testing machine on sample bricks cured for 7 and 28 days to verify they meet the required standard.
- Throughout the production run, the operator must perform regular checks:
- Finishing, Packaging, and Storage
- Once fully cured and tested, bricks may be packaged in cubes on wooden pallets and wrapped in plastic for weather protection and ease of handling during transport. They are stored in a finished goods yard, organized for efficient loading and dispatch to customers.
결론
Making bricks with a modern machine is a disciplined synthesis of material science, mechanical engineering, and process control. It is a cycle that begins with geology and chemistry and ends with a durable building block of the human-made environment. For the distributor, conveying this entire workflow is essential. It shifts the client’s perspective from seeing the machine as an isolated tool to understanding it as the central component of an integrated production system.
Mastery of this process—from precise mix design and consistent feeding to disciplined curing—is what separates a profitable, reputable block manufacturer from an unreliable one. By providing this holistic operational blueprint, distributors empower their clients to achieve not just production, but 품질 production. This, in turn, protects the distributor’s reputation, leads to higher client success and retention, and fosters a partnership based on shared knowledge and a commitment to excellence in the built environment. The machine is the engine, but the process is the vehicle for business success.
자주 묻는 질문 (FAQ)
Q1: What is the single most common mistake made by new operators in the brick-making process?
A: Inconsistent or incorrect moisture content in the mix is the most prevalent and critical error. A mix that is too dry will not compact properly, resulting in weak, crumbly bricks that may collapse during ejection. A mix that is too wet will stick to the mold, deform under its own weight, and produce bricks with low strength and high shrinkage cracks. Mastering the “hand-squeeze” test or using a moisture meter is an operator’s first essential skill.
Q2: How long does it take from starting the mixer to having a brick ready for curing?
A: The cycle time is remarkably fast. For a modern automatic machine, the core process—from the moment mixed material is fed to the ejection of a formed green brick onto a pallet—can take as little as 10 to 30 seconds, depending on the block type and machine model. This speed is what enables high-volume production.
Q3: Can you stop and restart production at any time, or are there specific break points?
A: You should plan breaks around the mixing cycle. It is highly inadvisable to leave mixed concrete in the machine hopper for more than 20-30 minutes, as it will begin to set. The ideal break point is after completing a full batch of bricks from one mixer load and before charging the hopper with a new batch. The machine should be put through several “no-feed” cycles to clear any residual material from the mold before an extended stop.
Q4: What environmental conditions are ideal for curing bricks?
A: Curing should occur in a cool, humid, and stable environment. Direct sunlight and wind cause rapid, uneven moisture loss, leading to surface cracks and weak spots. The ideal is a dedicated, shaded curing shed where temperature and humidity can be somewhat controlled. This is why proper covered curing space is a non-negotiable part of factory planning.
Q5: How do you clean the brick machine at the end of a production run?
A: A rigorous cleaning routine is vital for machine longevity:
- Run the feed hopper empty.
- Execute several machine cycles with no material to eject any compacted residue from the mold.
- Manually clean the mold box, core rods, and press head with a brush and scraper (never metal on precision surfaces) to remove all adhered concrete.
- Clean the feeder mechanism and surrounding area of spillage.
- For weekly maintenance, a more thorough cleaning of the entire system is required. A clean machine prevents jams, ensures consistent brick dimensions, and reduces wear.