
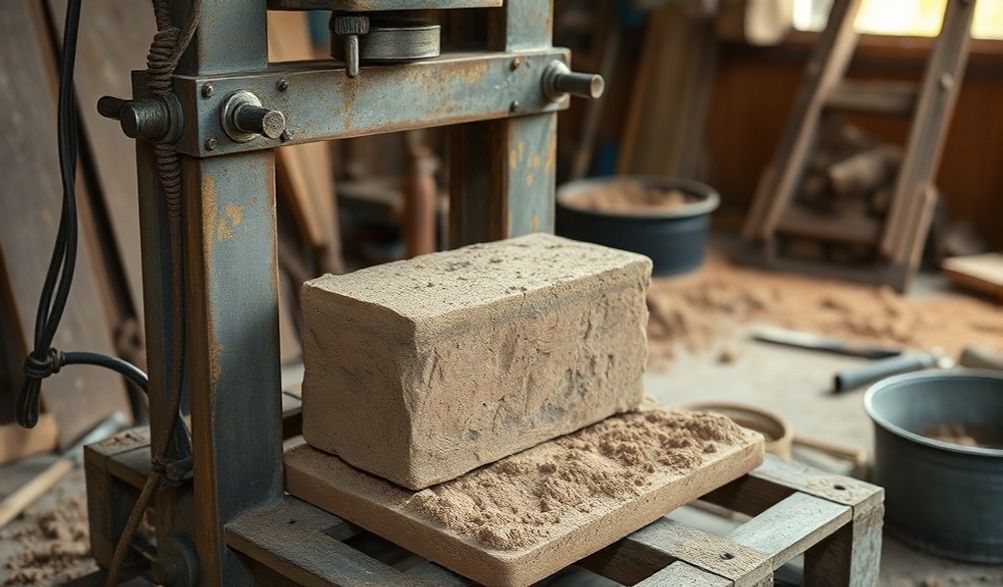
Integrum Manuale ad Machinam Laterariam Domesticam Aedificandam
Introductio
Cogita murum horti, officinam parvam, vel etiam domum ex lateribus quos ipse feceris construere, solo ipso sub pedibus tuo usus. Allicium sufficientiae propriae, sumptus materiae aedificandae spectabiliter minuendi, et alta satisfactio aliquid tangibilis ac duraturi creandi impetum faciendi per te ipsum ad fastigium impellunt. Machinam latericiam domesticam aedificare summum est propositum iis qui suas opes aedificandi in potestate habere volunt.
Ex annis experientiae manualis in constructione DIY et machinis parvis, hic ductor destinatus est processum clarificare. Te per omnia ducimus a mechanicis fundamentalibus quomodoMachina laterum domesticaAd fabricam minutiarum et ad scientiam crucialem mixturae soli tuae operatur.
Hoc amplum subsidium tibi praebebit veram ac gradatim descriptionem, ut adiuvet te aestimare an hoc magnum propositum aptum sit tuis peritiis, sumptui, propositis. Nota necessaria antequam incipiamus: machinam efficientem et tutam construere postulat solidam ingenii machinalis facultatem, severam observantiam praeceptorum securitatis, et responsalem inspectionem legum aedificandorum locorum tuorum. Hoc non est opus artificii unius hebdomadis, sed homini parato, labor est incredibiliter fructuosus.
Intellectus Machinarum Laterum Formandorum et Eorum Mechanica
Antequam ullum metallum petas aut arcum coniungentem ferias, necesse est intellegere quid aedifices. Machina lateraria, in suo pectore, instrumentum compressionis simplex sed potens est.
Quomodo Machinae Lateres Fingentes Operantur?
Principium cardinum universale est:materia umida et ductilis ingenti vi intra rigida forma comprimitur ut densum et cohaerens massam formet.Machina structuram praebet ad hanc rationem continendam et commoditatem mechanicam ad pressionem necessariam gignendam.
- Systemata Manualia (Manubrio Actuata)Haec sunt communissima ad consilia domestica. Utuntur vecte longo, saepe cum puncto cardinis, ut vim utentis multiplicent in laminam compressionis. Cogita illud ut morsum ingentem et proprium.
- Semiautomatica (Motorizata) Systemata:Haec hydraulicam vel mechanicam pressam includunt, quae ab electro motore vel machina agitur. Quamquam difficiliora sunt aedificare, maiorem constantiam praebent et minus laboris corporalis per laterem requirunt.
Processus cyclicus est: formam imple, compressionem adhibe, retine, dimitte, et laterem formatum eice.
Genera Laterum Quae Domi Facere Potes
Machinae tuae forma fictilis lateris genus praescribit. Domi factis machinis aptissima sunt:
- Lateres Terrae Compressi (LTC):Haec sunt densa latera ex apto subhumo mixto facta, alta pressione compacta. Parvo cementi pondere (5-10%) firmari possunt ad auctam durabilitatem et tempestatum resistentiam.
- Lateres Implicati:Haec superiores inferioresque partes habent inter se cohaerentes, quae opus caementi in nonnullis usibus minuunt vel tollunt. Forma quidem multipliciore egent, sed aedificationem celeriorem praebent.
- Simplicia Rectangula Latercula:Forma normalis, lateris solidi figura. Haec forma facillima est ad fabricandum et optima ad discendum processum et ad usum generalem.
Materiae mixtio—sive argillosa terra, sive arenosior mixtura, sive caementata temperatio—eligetur secundum lateris speciem eiusque destinatum usum.
Instrumenta et Materiae Necessariae ad Structuram Tuam
Aedificatio prospera rectis elementis incipit. Robur et subtilitas hic non sunt negandi.
Elementa Metalli & Compages Structurae
Haec est compages machinae tuae. De qualitate ne concedas.
* Structura Machina:Ferrea gravis tubulatura quadrata (minime 2″x2″ cum pariete 1/8″) vel canalis C-formis. Haec necesse est resistere flectioni sub pressura multarum tonnarum.
* Capsula Formatoria 1/4″ thick steel plate is ideal for the mold walls and compression plates. Thinner metal will warp.
* Fasteners & Hardware: High-tensile strength bolts, nuts, and washers. Heavy-duty hinges for any access doors or lids.
* Compressio Mechanismus: A 10-20 ton hydraulic bottle jack (the most common choice) or the materials to build a robust lever system (solid steel rod, pivot pins).
Tools You’ll Need in the Workshop
You will need access to a well-equipped metalworking shop:
* Welder: A MIG or ARC welder capable of welding 1/4″ steel. Strong, penetrating welds are critical.
* Angle Grinder: With cutting and grinding discs for shaping metal and cleaning welds.
* Drill Press or Heavy-Duty Hand Drill: For drilling precise holes in thick steel.
* Measuring & Layout Tools: Tape measure, combination square, marker, and center punch.
* Clamps: Multiple C-clamps or locking pliers to hold components square for welding.
* Safety Gear: Non-negotiable. Welding helmet, heavy-duty gloves, safety goggles, ear protection, and a respirator for grinding.
Sourcing Materials Responsibly
Cost can be managed through smart sourcing:
* Scrap Yards: An excellent source for heavy steel tubing, plate, and odd parts. Inspect for cracks or severe rust.
* Metal Suppliers: For new, guaranteed-quality steel. You’ll pay more but get precise dimensions and known metallurgy.
* Online Marketplaces: For items like the hydraulic jack.
* Key Principle: When in doubt, overbuild. A machine that flexes or fails under pressure is useless and dangerous.
Step-by-Step Assembly Guide (Core Process)
This is a conceptual guide. Always work from detailed, engineered plans for your specific design.
Phase 1: Building the Main Frame and Compression Chamber
- Secans: Precisely cut all frame members to the dimensions in your plans using the angle grinder.
- Tack Welding: Assemble the frame on a flat surface (e.g., a leveled workbench). Use the combination square to ensure every angle is 90 degrees. Tack weld all joints.
- Final Welding: Once the entire frame is square and true, complete the welds. Weld both sides of joints where possible for maximum strength. Allow welds to cool slowly to prevent brittleness.
Phase 2: Fabricating the Mold and Ejection System
- Capsula Formatoria Weld the 1/4″ steel plates into an open-top box. The interior dimensions define your brick size (allow for ~10% shrinkage after compression and curing).
- Ejection Plate: Fabricate a steel plate that fits snugly inside the mold. This will be the “floor” that pushes the finished brick out.
- Mechanismus Ejectionis: This can be a simple lever system that lifts the ejection plate from below, or a design where the entire mold box tilts or opens.
Phase 3: Installing the Compression Mechanism
- For Hydraulic Jack Systems: Weld a sturdy mounting plate at the top center of the frame. The jack will sit here, pressing a “compression head” plate down into the mold.
- For Lever Systems: Design and install a strong pivot point above the mold. The lever must be long enough to provide a mechanical advantage sufficient to achieve high pressure. This often requires careful calculation.
- Conformatio: The force must be applied perfectly vertically and centered. Any misalignment will cause binding and uneven bricks.
Preparing the Right Soil Mix for Durable Bricks
The best machine in the world will fail with poor material. Your soil is your recipe.
Soil Testing: The Key to Success
Start with the simple “jar test”:
1. Fill a clear jar 1/3 with dry, crushed soil.
2. Add water until the jar is 2/3 full, then shake vigorously for several minutes.
3. Let it settle for 24 hours. Layers will form: coarse sand at the bottom, silt in the middle, and clay on top.
4. Measure each layer. An ideal CEB mix often falls in the range of ~70% sand and gravel, 15-30% silt, and 10-20% clay.
Optimal Mix Formulas
- Stabilized Earth Block (Most Common & Recommended): Screened soil (free of organic matter) + 5-10% Portland cement by volume. Mix thoroughly dry first, then add water.
- High-Clay Brick: For a more traditional unfired adobe-style brick, you’ll want a mix with 25-30% clay. These require longer curing and protection from rain.
Moisture Content and Curing
- Moisture: The mix should be damp, not wet or crumbly. The “proctor test”: squeeze a handful tightly. It should form a firm ball that holds its shape and shows slight moisture on your fingers without dripping.
- Sanatio: This is where bricks gain strength. Keep stabilized blocks damp under plastic sheeting for 7-14 days, then allow to air-dry for several weeks before use. Never let them dry too quickly (cracking) or freeze while wet.
Critical Safety Protocols and Best Practices
Workshop and Build Safety
- Welding: Work in a well-ventilated area, free of flammables. Wear your full-face helmet and protective clothing to avoid arc flash and burns.
- Grinding/Cutting: Always use a guard on the angle grinder, wear a face shield over safety glasses, and secure the workpiece.
- Lifting: Get help with heavy steel components. Use proper lifting technique to avoid injury.
Operational Safety and Maintenance
- Inspect Before Use: Check all welds for cracks, ensure bolts are tight, and verify the hydraulic jack is functioning smoothly.
- Clear the Area: Keep hands, tools, and loose clothing clear of the compression area during operation.
- Maintenance: Regularly clean the mold, lubricate moving parts, and check for wear on the ejection system and compression plates.
Evaluating Cost, Time, and Practicality
Homemade vs. Commercial Machines: A Breakdown
| Factor | Homemade Machine | Small Commercial Machine |
| :— | :— | :— |
| Upfront Cost | $200 – $800+ (scrap vs. new materials) | $1,500 – $5,000+ |
| Capability | Customizable, but output is low (50-100 bricks/day). | Higher, consistent output. Engineered for production. |
| Firmitas | Depends entirely on builder skill and material quality. | Professionally manufactured with warranties. |
| Time Investment | Altus. 40-100+ hours to build, plus learning curve. | Humilis. Unbox, set up, and start production. |
| Satisfaction | Extremely high if successful. A true DIY achievement. | Functional, but no personal creation aspect. |
Is Building Your Own Machine Worth It?
It is worth it if you:
* Have a specific, finite project (e.g., a garden perimeter, shed).
* Are located remotely where transporting bricks is prohibitively expensive.
* Possess intermediate-to-advanced welding/fabrication skills and enjoy the challenge.
* Value the knowledge and self-reliance as much as the end product.
You should consider buying if you:
* Need bricks for a large or time-sensitive project.
* Lack confidence in your metalworking abilities.
* Require certified, code-compliant bricks for a primary dwelling.
* Want a turn-key solution with reliable output.
Interrogationes Saepius Petitae (ISP)
Q1: How much does it cost to build a homemade brick making machine?
A: The cost spectrum is wide. A minimalist build using scavenged scrap metal and a used jack can be under $200. A robust, all-new steel build with a quality jack and hardware will likely run between $500 and $800. Your investment is primarily time and skill.
Q2: What is the strongest brick mix I can make at home?
A: For a homemade press, a well-compacted cement-stabilized earth block (8-10% cement) with optimal soil grading and proper curing will yield the strongest result. However, it’s important to note that these still differ from kiln-fired clay bricks and have lower tensile strength. Their compressive strength can be ample for many applications.
Q3: Can I make bricks for a house or structural wall with a homemade machine?
A: This is the most critical question. You must consult a qualified structural engineer and your local building code office. Homemade bricks can be suitable for non-load-bearing structures like garden walls, sheds, or interior partitions. Using them for a primary residence’s load-bearing walls is a major engineering undertaking that requires professional mix design, testing, and approval.
Q4: Where can I find detailed DIY plans or blueprints?
A: Look to reputable engineering-for-development resources like Open Source Ecology, university agricultural or appropriate technology extensions (e.g., University of California, Davis), and dedicated DIY construction forums. Always vet plans carefully—look for ones that include material specs, weld diagrams, and stress calculations.
Q5: What are the most common mistakes to avoid?
A:
* Using under-spec materials: Thin metal that bends.
* Skipping soil testing: Guessing your mix leads to weak, crumbly bricks.
* Insufficient compression: Not achieving high enough pressure for proper block density.
* Neglecting curing: Letting bricks dry out too fast, causing cracks.
* Rushing safety: One lapse with a grinder or welder can cause serious injury.
Conclusio.
Building a Machina laterum domestica is a journey that blends practical engineering, materials science, and old-fashioned hands-on skill. We’ve covered the path from understanding the core mechanics of compression to assembling a sturdy frame, fabricating a precise mold, and mastering the crucial art of the soil mix.
The advice here is rooted in practical, hands-on experience, designed to give you a clear-eyed view of the challenges and rewards. Our final recommendation is this: honestly assess your workshop skills, your project needs, and your local regulations. If you proceed, start methodically. Consider building a simple, single-brick mold prototype first to test your soil and process before committing to a full machine.
Have specific questions about weld types, soil ratios, or mechanism design? Share your thoughts below. For those looking to deepen their knowledge, we recommend further reading on soil mechanics and advanced workshop fabrication techniques.
<