
How to Build a Cinder Block: A Step-by-Step Guide for DIYers and Professionals
Hordhac
You’ve finally decided to build that garden wall, create a sturdy base for your new shed, or maybe even construct a privacy screen. You want something strong, durable, and cost-effective. Your research inevitably points you toward one of the most versatile building materials available: the humble cinder block.
But a quick search for “how to build a cinder block” reveals a small puzzle. Cinder blocks themselves are manufactured in factories; you don’t typically “build” them from scratch in your garage. What you’re really looking for is how to build with cinder blocks—how to transform a stack of heavy, gray units into a straight, solid, and lasting structure.
That’s exactly what this definitive guide provides. Drawing from professional masonry standards and proven DIY best practices, this tutorial will walk you through the entire process. We’ll demystify the terminology, stress the non-negotiable safety and planning steps, and give you the hands-on techniques to lay a course like a pro. By the end, you’ll understand not just the “how,” but the “why” behind each step, empowering you to tackle your project with confidence and ensure it stands the test of time.
Understanding Cinder Blocks: More Than Just Gray Bricks
Before you pick up a trowel, it’s crucial to understand the material you’re working with. This knowledge is what separates a well-informed builder from someone just piling blocks together.
What is a Cinder Block? (CMU Explained)
First, let’s clarify the name. The term “cinder block” is a holdover from the early 20th century when blocks were often made with coal cinders as a lightweight aggregate. Today, they are almost universally Concrete Masonry Units (CMUs).
- Composition: Modern CMUs are made from a mixture of Portland cement, water, and aggregates like sand and fine gravel. Industrial by-products like fly ash are also commonly used.
- Key Characteristics: These blocks are prized for their high compressive strength (they handle heavy vertical loads well), good thermal mass, and excellent fire resistance. They are porous, which is why sealing is often recommended.
Common Types, Sizes, and Their Uses
Not all blocks are created equal. Knowing the right type for your job is essential.
- Standard Stretcher Block: This is the workhorse. Its nominal dimensions are 8 inches high, 8 inches deep, and 16 inches long (allowing for 3/8-inch mortar joints). It has two or three hollow cores.
- Corner & Jamb Blocks: These have one smooth, finished end for creating clean corners or door/window openings.
- Solid vs. Hollow Core: Hollow-core blocks are lighter and used for most walls. Solid blocks are used where maximum strength or a solid anchoring surface is needed.
- Half-Blocks & Lintels: For finishing a course without cutting, or for spanning openings.
Essential Tools and Materials You’ll Need
Gathering the right gear before you start is half the battle. Here’s your checklist:
Tools:
* Mason’s Trowel (for spreading mortar)
* Jointer (for finishing mortar joints)
* Levels (a 4-foot level and a torpedo level)
* Mason’s Line & Line Blocks (for keeping courses straight)
* Rubber Mallet or Hammer
* Masonry Chisel (for cutting blocks)
* Wheelbarrow & Mortar Hoe (for mixing)
* Tape Measure
* Stiff Bristle Brush
* Safety Glasses, Gloves, and Dust Mask
Qalabka:
* Cinder Blocks (CMUs)
* Mortar Mix (Type N or Type S—we’ll discuss this next)
* Concrete Mix (for filling cores with rebar)
* Rebar (for reinforcement)
* Gravel & Concrete (for the footing)
Pre-Construction: Planning and Foundation are Everything
Rushing to lay the first block is the most common and costly mistake. A successful project is built here, on the drawing board and the foundation.
Design and Measurement: Blueprinting Your Project
Start with a simple sketch. It doesn’t need to be architectural-grade, but it should note:
* Overall dimensions (length, height, thickness).
* The location of any corners, ends, or openings.
* Calculate Your Blocks: For a single-layer wall, calculate the number of blocks per course (Length in inches / 16) and multiply by the number of courses (Height in inches / 8). Always add 10% for waste, cuts, and breakage.
* Bond Pattern: For most DIY projects, the running bond is used. This simply means each block in a course overlaps the joint of the block below it, like brickwork. This is crucial for structural integrity.
Preparing a Solid Foundation
This is the single most important step. A cinder block structure is only as strong as its foundation.
- The Rule: Any wall over a few courses high, or any load-bearing wall, requires a continuous poured concrete footing below the frost line.
- For Non-Load-Bearing Walls (like a short garden wall), a well-compacted gravel base (4-6 inches deep) over landscape fabric can suffice.
- Footing Steps:
- Mark the layout of your wall with stakes and string.
- Excavate a trench wider than your wall and deep enough per local code (often below frost line).
- Build a wooden form to contain the wet concrete.
- Pour a concrete mix into the form, level it, and embed short lengths of rebar (“dobies”) if you plan to tie your wall into the footing.
- Let the footing cure completely (at least 48 hours) before proceeding.
Safety First: Gear and Precautions
Cinder block work is physically demanding. Respect the process.
* PPE is Non-Negotiable: Wear safety glasses when cutting or chipping, gloves to protect your hands from mortar and rough edges, and a dust mask when mixing dry materials.
* Lift with Your Legs: Blocks are heavy. Bend at the knees, keep your back straight, and hold the block close to your body.
* Keep a Clean Site: Tripping over a stray block or a tangled line is dangerous. Keep your workspace organized.
The Art of Mortar: Mixing and Application
Mortar is the glue that holds your wall together. Getting it right affects everything from strength to appearance.
Choosing and Mixing Mortar to the Right Consistency
- Type N vs. Type S: For most above-ground, non-load-bearing DIY projects (garden walls, planters), Type N mortar is perfect. For anything below ground, retaining walls, or in areas with high lateral pressure, use the stronger Type S.
- Isku-dhafka: Always follow the bag instructions. The general process is:
- Pour dry mix into a wheelbarrow or mortar tub.
- Form a crater in the center and add clean water gradually.
- Mix thoroughly with a mortar hoe, scraping from the bottom.
- Aim for a “buttery” consistency—it should hold its shape on a trowel but be soft enough to easily spread. Add water or mix in small increments to adjust.
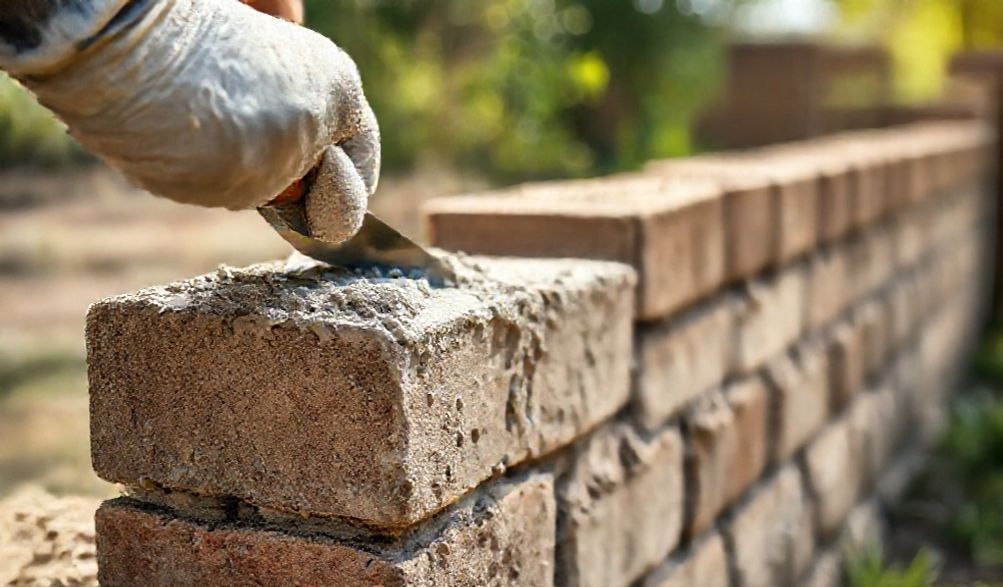
Mastering the Trowel: Bed and Buttering Joints
- Throwing a Bed: Scoop mortar onto your trowel and “throw” it onto the footing or previous course. Spread it to a consistent thickness (about 1 inch).
- Furrowing: Use the point of your trowel to create a shallow furrow down the center of the mortar bed. This helps the block settle evenly.
- Buttering: Apply mortar to the vertical end of a block (the “head joint”) before placing it. This ensures a full, strong joint on all sides.
Step-by-Step: Laying Your First Course and Building Up
Now for the hands-on part. Precision here sets the tone for the entire wall.
Setting the Critical First Course
- Start at a Corner: Lay a full mortar bed on the footing for 3-4 blocks. Place your first corner block, pressing it firmly into the mortar.
- Level and Align: Use your 4-foot level to check that the block is perfectly level from front-to-back and side-to-side. Tap it gently with the handle of your trowel to adjust.
- Set the Line: Once your first corner block is set, build up the corner 3-4 blocks high, checking for level and plumb (perfectly vertical) with each block. Repeat at the other end of your wall.
- String the Line: Attach a mason’s line between the two corners at the height of your next course. This line will guide the top, outside edge of every block in that course.
Building the Corners and Running the Line
- The Lead-and-Line Method: This is the professional approach. You build up the corners (“leads”) first, 3-4 courses high. Then, you fill in the middle (“running”) by laying blocks along the mason’s line stretched between the leads.
- Checking Constantly: For every block you lay:
- Is its top edge touching the mason’s line? (Alignment)
- Is it level side-to-side? (Level)
- Is its face plumb? (Vertical)
Cutting Blocks and Installing Reinforcement
- Gooyn: To cut a block, score a deep line on all faces with a masonry chisel. Place the block on solid ground, align the chisel on the score line, and strike sharply with a hammer. Practice on a scrap piece first.
- Reinforcement: For stronger walls (retaining walls, tall fences):
- Vertical: Place rebar into the hollow cores of the blocks at regular intervals (e.g., every 32 inches). Fill the core around the rebar with a soupy concrete mix.
- Horizontal: Lay ladder- or truss-type reinforcement mesh in the mortar bed every few courses. This helps control cracking.
Finishing Touches: Joints, Curing, and Waterproofing
A wall can be strong but look amateurish without proper finishing. These steps ensure durability and a clean look.
Tooling the Mortar Joints
Do not skip this. Tooling compacts the mortar and seals the edge against water.
1. Wait for the Right Time: Mortar should be “thumbprint hard”—when you press it, it leaves a slight imprint but doesn’t squeeze out.
2. Choose a Jointer: A concave jointer is most common and provides excellent weather resistance.
3. Tool Evenly: Run the jointer firmly and evenly along all horizontal joints first, then the vertical ones. Apply consistent pressure for a uniform look.
Curing and Cleanup
- Daweynta: Mortar gains strength through a slow, chemical process. For 24-48 hours after finishing, protect your wall from direct sun and wind. Lightly mist it with water a few times a day to prevent it from drying too quickly.
- Cleanup: Use a dry, stiff brush to remove excess mortar from the block faces before it fully hardens (usually within a few hours). Once hard, removal is very difficult.
Sealing and Waterproofing (For Exterior Walls)
To prevent water intrusion, staining, and white mineral deposits (efflorescence), apply a breathable, penetrating masonry sealer after the wall has fully cured (at least 28 days). This allows moisture vapor to escape while blocking liquid water.
Su'aalaha Inta Badan La Is Weydiiyo (FAQ)
Q: What’s the difference between cinder blocks and concrete blocks?
A: Historically, “cinder” blocks used coal cinders as aggregate. Today, “concrete block” or “CMU” is the accurate term, as they are made with concrete aggregates. The terms are often used interchangeably now.
Q: Can I build a cinder block wall without mortar?
A: For a permanent, structural, or safe wall, no. Mortar provides essential compressive strength, binds the blocks together, and evenly distributes loads. Dry-stacking (without mortar) is only suitable for very low, single-course, non-structural projects like garden borders.
Q: How long does it take for a cinder block wall to cure fully?
A: Mortar sets enough to handle in 24-48 hours. However, it reaches its full design strength over 28 days. Avoid applying significant lateral pressure or heavy loads to the wall during this period.
Q: Do I need a permit to build a cinder block wall?
A:Always check with your local building department. Regulations vary widely. Retaining walls over a certain height (often 3-4 feet), property line fences, and any load-bearing structure almost always require a permit and inspection for safety.
Q: How do I prevent cracks in my cinder block wall?
A: Use a proper, reinforced footing; include control joints in long walls (every 20-25 feet); use the correct mortar type and mix; and ensure thorough, slow curing. For long walls, horizontal reinforcement mesh is highly recommended.
Gabagabo
Building with cinder blocks is a rewarding skill that blends physical work with meticulous craftsmanship. We’ve covered the full journey: from understanding the material and the absolute necessity of a solid foundation, through the art of mixing mortar and the precise technique of laying and aligning blocks, to the final, crucial steps of finishing and curing.
Remember, the hallmark of a professional-quality job isn’t speed—it’s patience and attention to detail. Don’t skip the planning or rush the footing. Take the time to check for level and plumb on every single block. This diligence is what creates a structure that is not only strong and functional but also something you can be proud of for years to come.
You are now equipped to confidently tackle DIY projects like garden walls, planters, or simple outdoor structures. For anything load-bearing, structural, or complex, never hesitate to consult with or hire a licensed professional. Their expertise is invaluable for ensuring safety and code compliance.
Have questions about a specific project detail? Feel free to reach out. For more advanced topics, like building a full block foundation, stay tuned for future guides.
<