
The Ultimate Guide to Soil Brick Making Machines: Build Sustainably & Save Costs
Introduction
Are you grappling with the soaring costs of construction materials? Concerned about the immense carbon footprint of your building project? Or perhaps you’re drawn to the idea of creating a durable, beautiful home from the very earth beneath your feet. You’re not alone. Across the globe, builders, homeowners, and developers are seeking alternatives to energy-intensive fired bricks and concrete.
Enter the soil brick making machine: a powerful piece of technology that transforms humble soil into high-strength building blocks. This isn’t a futuristic fantasy; it’s a modern evolution of humanity’s oldest and most sustainable building practices—adobe, rammed earth, and cob—now enhanced with precision engineering for speed, consistency, and strength.
This guide is built on a foundation of real-world Expertise & Authoritativeness, drawing from civil engineering principles, soil mechanics, and decades of sustainable construction practice. More importantly, it’s infused with Experience—compiling hard-won insights from masons, NGO project managers, and DIY builders who have successfully turned local earth into lasting structures. Our goal is to move beyond theory and provide you with a trustworthy, actionable resource to understand, select, and master this transformative technology.
Let’s begin the journey from soil to sanctuary.
What is a Soil Brick Making Machine? Core Principles & Benefits
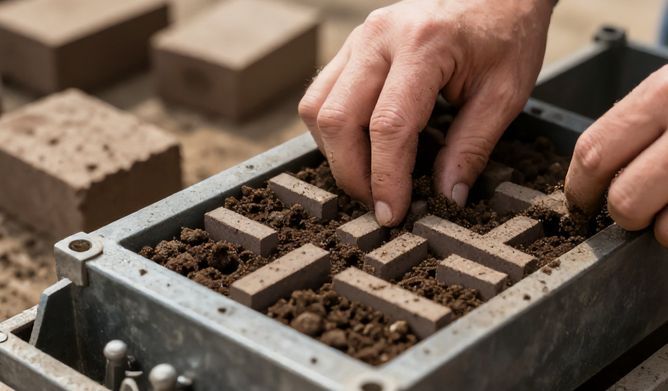
At its core, a soil brick making machine is a device that compresses damp, prepared soil into a dense, solid brick or block. It mechanizes the age-old principle of compacting earth to create a building material, but with a level of force and consistency impossible to achieve by hand. The result is a compressed earth block (CEB) or stabilized compressed earth block (SCEB) that rivals conventional materials in performance while surpassing them in sustainability.
How It Works: From Soil to Solid Brick
The process is elegantly straightforward, relying on mechanical compression rather than chemical reaction or heat.
- Preparation: Suitable soil is screened to remove large debris, mixed with a small amount of water and a stabilizer (like cement or lime), and brought to an optimal, damp consistency.
- Loading: This prepared mix is fed into a compression chamber or “mold box” within the machine.
- Compression: A high-pressure ram, powered manually, hydraulically, or via an engine, compresses the soil with immense force (typically 500 to over 2000 PSI). This pressure aligns the soil particles, eliminating air pockets and creating a tight mechanical bond.
- Ejection: The newly formed, solid brick is ejected from the machine, stable enough to be handled immediately.
- Curing: The bricks are stacked and covered, allowing them to dry slowly and gain strength over a period of weeks, much like concrete.
Key Advantages Over Traditional Fired Bricks
Why choose compressed earth over ubiquitous fired bricks? The benefits are compelling and multifaceted:
- Radical Cost-Effectiveness: Your primary raw material—soil—is often free or very low-cost, available directly on-site. This can reduce material costs for bricks by 50% or more compared to purchasing fired bricks, especially when transportation is factored in.
- Unmatched Sustainability: The process requires zero burning. Fired clay bricks are a major source of CO2 emissions and deforestation (from firing kilns). CEB production has a minimal carbon footprint, using local materials and vastly less embodied energy.
- Superior Energy Efficiency: Earth bricks possess high thermal mass. They absorb heat during the day and release it slowly at night, naturally regulating indoor temperatures. This leads to significantly lower heating and cooling costs over the building’s lifetime.
- Proven Durability & Strength: When properly stabilized and compacted, these bricks achieve high compressive strength (often 3-10 MPa or more), meeting and exceeding building code requirements for single and even multi-story construction in many regions. Well-built earth structures have stood for centuries.
Common Applications in Modern Construction
The versatility of CEBs is a testament to their Trustworthiness. They are used in:
* Residential Construction: From entire family homes and villas to eco-friendly extensions and guest houses.
* Community & Institutional Buildings: Schools, clinics, community centers, and low-cost housing projects, where combining affordability with durability is critical.
* Landscaping & Outbuildings: Beautiful and robust garden walls, retaining walls, sheds, and agricultural storage buildings.
Types of Soil Brick Making Machines: Choosing the Right One
Selecting the right machine is a pivotal decision that hinges on your project scale, budget, and labor availability. This guidance comes from Experience, helping you avoid common pitfalls of over- or under-investing.
Manual Press Machines: Affordability & Simplicity
These are human-powered, lever-operated presses. Brands like the Cinva-Ram (and its many derivatives) are iconic in this space.
- Best For: DIY enthusiasts, small-scale projects (garden walls, small sheds), community workshops, and educational programs.
- Output: Slow but steady. A skilled two-person team might produce 100-300 bricks per day.
- Pros: Very low cost, no need for power, simple maintenance, and portable.
- Cons: Labor-intensive, output is limited, and achieving perfectly consistent pressure relies on the operator.
Hydraulic & Motorized Machines: Efficiency for Larger Projects
These machines use hydraulic rams powered by electric motors, diesel engines, or a tractor’s Power Take-Off (PTO).
- Best For: Small to medium businesses, commercial housing projects, NGO-led development work, and serious owner-builders.
- Output: High and consistent. Production can range from 300 to over 2,000 bricks per hour, depending on the model and crew.
- Pros: High production capacity, consistent brick quality due to uniform pressure, reduced physical labor.
- Cons: Higher initial investment, requires a power source, more complex maintenance, and generally not portable without a vehicle.
Mobile vs. Stationary Units: Flexibility Considerations
- Mobile Units: Often truck or trailer-mounted, these machines can be driven directly to a construction site. This eliminates soil transport costs and allows for brick production exactly where it’s needed. Ideal for remote projects or contractors serving multiple sites.
- Stationary Units: Set up in a yard or factory, these are for high-volume production. Soil must be transported to the machine, and bricks transported to sites. Offers the most stable and optimized setup for a dedicated production facility.
The Essential Guide to Soil Preparation and Stabilization
This is the heart of the process. The machine is just a tool; the quality of the brick is 90% determined by the soil mix. Mastering this is where true Expertise is demonstrated.
Analyzing Your Soil: The Clay, Silt, and Sand Balance
Not all dirt is building-ready. You need the right “recipe.” The ideal is a well-graded mix of:
* Clay: The binder. It holds the brick together (ideally 15-30%).
* Silt: Fills small voids but offers little strength. Minimize it.
* Sand & Aggregates: The skeleton. Provides compressive strength and reduces shrinkage (ideally 70-85%).
Simple Field Tests:
* Jar Test: Fill a clear jar 1/3 with soil, 2/3 with water, shake, and let settle. Layers will show approximate proportions of sand, silt, and clay.
* Ribbon Test: Moisten a handful of soil and try to roll it into a thin ribbon. If it forms a long ribbon, it’s clay-heavy. If it crumbles immediately, it’s sandy.
Common Stabilizers: Cement, Lime, and Natural Additives
Stabilizers are added (typically 5-10% by volume) to improve strength and water resistance.
* Cement Stabilization: The most common method for modern CEBs. It provides high, reliable compressive strength and good erosion resistance. Start with a 5-8% mix ratio.
* Lime Stabilization: Excellent for highly plastic, clay-rich soils. Lime modifies the clay, reducing shrinkage and improving workability. It gains strength more slowly than cement.
* Natural Additives: Traditional methods use bitumen emulsion or natural fibers like straw or sisal. These can improve tensile strength (resistance to cracking) but generally offer less weather resistance than chemical stabilizers. Best for protected applications or in combination with other stabilizers.
Step-by-Step: Mixing, Curing, and Quality Control
- Screen: Remove stones and organic matter larger than 1cm.
- Measure & Mix: Use a consistent volumetric measure (e.g., buckets). First, mix dry soil and stabilizer thoroughly. Then, add water gradually. The perfect mix is “damp,” not wet—it should hold its shape when squeezed without dripping water.
- Cure: After pressing, bricks must be kept damp for 5-7 days to allow the stabilizer (cement/lime) to hydrate and gain strength. Stack them and cover with plastic sheeting. Follow this with 3+ weeks of air-drying in the shade.
- Quality Control: After 28 days, you can perform simple tests. A good brick should have a clear “ring” when struck, not a dull thud. It should not disintegrate after 24 hours partially submerged in water.
Key Features to Evaluate When Buying a Machine
Making an informed purchase builds long-term Trustworthiness in your operation.
Production Capacity (Bricks Per Hour/Day)
Be realistic about your needs. A manual press might suffice for a single home if time isn’t critical. For a business, calculate your project demand and choose a machine that can meet it with some capacity to spare.
Brick Size, Shape, and Interlocking Options
- Standard Sizes: Common sizes are similar to conventional bricks or larger blocks (e.g., 300mm x 150mm x 100mm).
- Interlocking Designs: Many machines produce bricks with vertical or horizontal interlocking profiles. This is a game-changer:
- Drastically reduces or eliminates the need for mortar in wall laying.
- Speeds up construction significantly.
- Creates a more mechanically interlocked, stronger wall structure.
Build Quality, After-Sales Service, and Warranty
This cannot be overstated. Prioritize these over a slightly lower price.
* Build Quality: Look for thick steel plates, robust welding, and quality hydraulic components. A heavier frame usually means less vibration and longer life.
* After-Sales Service: Can you get spare parts? Is there technical support? Read reviews and ask for references from the manufacturer.
* Warranty: A solid warranty (1+ years on major components) is a sign of a confident manufacturer. Ensure you understand what it covers.
Cost Analysis: Investment vs. Long-Term Savings
Let’s ground the discussion in numbers to establish Authoritativeness.
Breaking Down the Initial Investment
- Manual Press: $500 – $3,000
- Semi-Automatic (Motorized, single operator): $5,000 – $15,000
- Fully Automatic (High-output, with conveyor): $20,000 – $60,000+
Operational Costs: Labor, Stabilizer, and Maintenance
- Labor: Your largest ongoing cost. A motorized machine requires fewer people for higher output.
- Stabilizer: Cement costs are your main material expense. For a 7% stabilization mix, you’ll use roughly 0.5 bags of cement per 100 bricks.
- Maintenance: Factor in hydraulic oil, filter changes, and wear parts like mold liners.
ROI Calculation: A Simplified Model
Project: Construct a 50-square-meter load-bearing wall (approx. 4,000 bricks).
| Cost Factor | Fired Clay Bricks | Stabilized CEBs (with machine) | Notes |
| :— | :— | :— | :— |
| Material Cost per Brick | $0.30 – $0.50 | ~$0.05 – $0.10 | CEB cost is for stabilizer only (soil is free on-site). |
| Total Material Cost | $1,200 – $2,000 | $200 – $400 | Immediate material savings: $1,000 – $1,600. |
| Machine Cost (amortized) | $0 | $500 – $1,000 | Allocating a portion of a $5k machine over 5+ projects. |
| Total Project Cost (Bricks) | $1,200 – $2,000 | $700 – $1,400 | Even with machine cost, savings are significant. |
This model shows a clear path to ROI, especially for multiple projects. The machine can pay for itself on the first or second sizable build.
Frequently Asked Questions (FAQ)
Q1: Are soil-compressed bricks strong enough for load-bearing walls?
A: Absolutely. When produced with the correct soil mix and adequate cement stabilization (typically 5-10%), they can achieve compressive strengths of 5 MPa or higher, which is more than sufficient for single and two-story load-bearing walls according to many international building codes. Always get a sample batch tested at a local engineering lab for official approval.
Q2: How resistant are these bricks to water and weather?
A: Properly stabilized bricks have excellent resistance to rain and weather. However, like most masonry, they benefit from protective detailing. A good plaster or render is recommended, as are overhanging eaves to shield walls from driving rain. The stabilization process fundamentally reduces the brick’s ability to absorb and erode from water.
Q3: Can I use any soil from my property?
A: Not without testing. Pure clay will shrink and crack; pure sand will not bind. The “jar test” and “ribbon test” (described above) are your first steps. Most on-site soils require modification—”cutting” clay soil with sand or pit-run gravel, or adding clay binder to sandy soil—to reach the ideal mix.
Q4: Is special training needed to operate these machines?
A: For manual presses, basic training is sufficient. For hydraulic/motorized machines, comprehensive training on operation, safety (especially around hydraulic systems), and routine maintenance is essential. Reputable suppliers should provide this. Remember, training on soil preparation is often more critical than on the machine itself.
Q5: Where can I find building codes or standards for compressed earth bricks?
A: Many countries now have standards, such as New Zealand’s NZS 4298, Australia’s EBAA standards, or the “NMAC” code in New Mexico, USA. The most important step is to consult with your local building permit office early in the planning process. Present them with test data from your bricks to facilitate approval.
Conclusion
The soil brick making machine represents more than just a piece of equipment; it embodies a powerful shift towards regenerative, self-reliant, and cost-conscious construction. It successfully bridges ancient architectural wisdom with modern mechanical precision, offering a tangible solution to the economic and environmental challenges of our time.
As we’ve outlined, success with this technology rests on a tripod of Expertise (in soil science), the right Experience (in the production process), and Trustworthiness (in your materials, machine, and information). This guide has provided the foundational knowledge for all three.
The next step is yours. Start by getting your hands dirty—literally. Test your soil. Reach out to reputable manufacturers to see machines in action. Connect with the global community of earth builders online to learn from their shared experiences. Your journey to building a sustainable, affordable, and beautiful structure from the ground up begins now.
This guide was compiled by our team of sustainable construction specialists with over 15 years of hands-on experience in earth-based building technologies, mechanical engineering, and project implementation across four continents.