
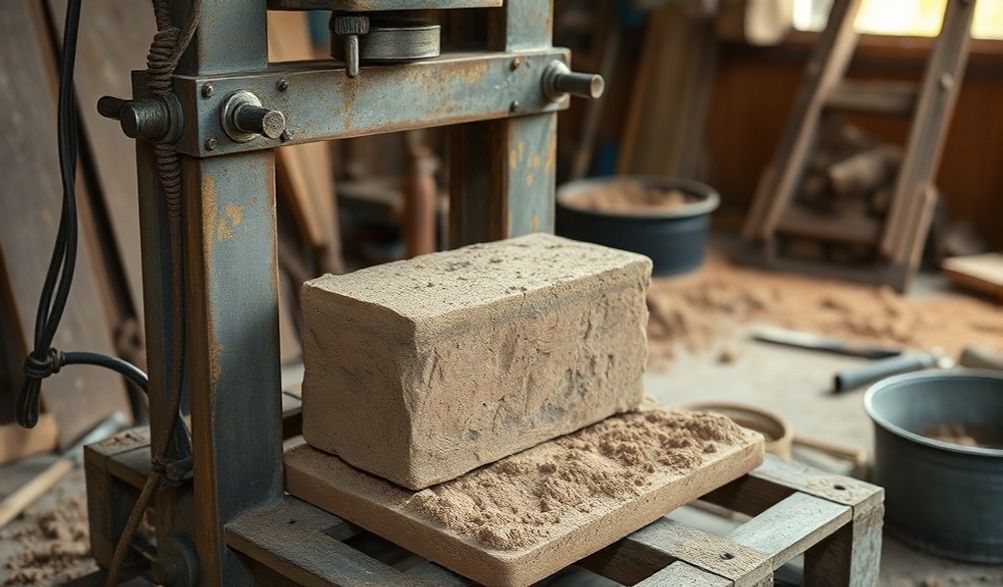
Panduan Lengkap Membina Mesin Pembuat Bata Buatan Sendiri
Pengenalan
Bayangkan membina tembok taman, sebuah bengkel kecil, atau bahkan sebuah rumah dari bata yang anda buat sendiri, menggunakan tanah di bawah kaki anda. Daya tarikan berdikari, penjimatan kos yang ketara bagi bahan binaan, dan kepuasan mendalam mencipta sesuatu yang nyata dan tahan lama adalah apa yang mendorong semangat DIY ke kemuncaknya. Membina mesin pembuat bata buatan sendiri adalah projek terunggul bagi mereka yang ingin mengawal sumber binaan mereka.
Berdasarkan pengalaman bertahun-tahun dalam pembinaan DIY dan mesin berskala kecil, panduan ini direka untuk menjelaskan proses tersebut. Kami akan membimbing anda melalui semua aspek, bermula daripada mekanik teras bagaimana sebuah...mesin pembuatan bata buatan sendiriberfungsi kepada pemasangan asas dan sains penting campuran tanah anda.
Sumber komprehensif ini akan memberikan anda gambaran yang realistik dan langkah demi langkah untuk membantu menilai sama ada projek bercita-cita tinggi ini sesuai dengan kemahiran, bajet dan matlamat anda. Nota penting sebelum kita bermula: membina mesin yang berfungsi dan selamat memerlukan kefahaman mekanikal yang kukuh, pematuhan ketat terhadap protokol keselamatan, dan semakan bertanggungjawab terhadap kod bangunan tempatan anda. Ini bukan projek kraf hujung minggu, tetapi bagi individu yang bersedia, ia adalah usaha yang sangat berbaloi.
Memahami Mesin Pembuatan Bata dan Mekaniknya
Sebelum mendapatkan sebarang logam atau memulakan arka kimpalan, adalah penting untuk memahami apa yang anda bina. Mesin pembuatan bata, pada terasnya, adalah alat mampatan yang mudah namun berkuasa.
Bagaimana Mesin Pembuatan Batu Bata Berfungsi?
Prinsip teras adalah universal:bahan lembap dan mudah dibentuk dimampatkan dengan daya yang amat besar di dalam acuan tegar untuk membentuk blok padat dan kohesif.Mesin ini menyediakan struktur untuk menampung proses ini dan kelebihan mekanikal untuk menghasilkan tekanan yang diperlukan.
- Sistem Manual (Dikendalikan Tuas):Ini adalah yang paling biasa untuk reka bentuk buatan sendiri. Mereka menggunakan tuas panjang, selalunya digabungkan dengan titik pangsi, untuk menggandakan daya pengguna ke atas plat mampatan. Bayangkannya sebagai gergasi khusus yang berfungsi seperti ragum.
- Sistem Semi-Automatik (Bermotor):Ini menggabungkan akhbar hidraulik atau mekanikal yang digerakkan oleh motor elektrik atau enjin. Walaupun lebih rumit untuk dibina, ia menawarkan konsistensi yang lebih tinggi dan memerlukan usaha fizikal yang kurang setiap bata.
Proses ini adalah kitaran: isi acuan, gunakan mampatan, tahan, lepaskan, dan keluarkan bata yang terbentuk.
Jenis-jenis Bata yang Boleh Dibuat di Rumah
Reka bentuk acuan mesin anda menentukan jenis bata. Yang paling sesuai untuk mesin buatan sendiri adalah:
- Blok Bumi Termampat (CEB):Inilah blok padat yang diperbuat daripada campuran tanah subur yang sesuai, dipadatkan pada tekanan tinggi. Ia boleh distabilkan dengan sedikit simen (5-10%) untuk ketahanan dan rintangan cuaca yang lebih baik.
- Bata Saling Kunci:Ini mempunyai bahagian atas dan bawah yang bercorak dan saling mengunci, mengurangkan atau menghapuskan keperluan mortar dalam beberapa aplikasi. Ia memerlukan acuan yang lebih kompleks tetapi menawarkan pembinaan yang lebih pantas.
- Blok Segi Empat Mudah:Bentuk bata pepejal yang standard. Ini adalah acuan paling mudah untuk difabrikasi dan sesuai untuk mempelajari proses serta kegunaan umum.
Campuran bahan—sama ada tanah yang kaya dengan tanah liat, campuran yang lebih berpasir, atau campuran stabil simen—akan dipilih berdasarkan jenis bata dan kegunaan yang dirancang.
Alat dan Bahan Penting untuk Pembinaan Anda
Pembinaan yang berjaya bermula dengan komponen yang tepat. Kekuatan dan ketepatan tidak boleh dirunding di sini.
Komponen Logam & Rangka Struktur
Inilah rangka mesin anda. Jangan kompromi terhadap kualiti.
* Kerangka Struktur:Tiub keluli segi empat tugas berat (minimum 2″x2″ dengan dinding 1/8″) atau C-salur. Ini mesti tahan lenturan di bawah tekanan bertan-tan.
* Kotak Acuan: 1/4″ thick steel plate is ideal for the mold walls and compression plates. Thinner metal will warp.
* Fasteners & Hardware: High-tensile strength bolts, nuts, and washers. Heavy-duty hinges for any access doors or lids.
* Mekanisme Mampatan: A 10-20 ton hydraulic bottle jack (the most common choice) or the materials to build a robust lever system (solid steel rod, pivot pins).
Tools You’ll Need in the Workshop
You will need access to a well-equipped metalworking shop:
* Welder: A MIG or ARC welder capable of welding 1/4″ steel. Strong, penetrating welds are critical.
* Angle Grinder: With cutting and grinding discs for shaping metal and cleaning welds.
* Drill Press or Heavy-Duty Hand Drill: For drilling precise holes in thick steel.
* Measuring & Layout Tools: Tape measure, combination square, marker, and center punch.
* Clamps: Multiple C-clamps or locking pliers to hold components square for welding.
* Safety Gear: Non-negotiable. Welding helmet, heavy-duty gloves, safety goggles, ear protection, and a respirator for grinding.
Sourcing Materials Responsibly
Cost can be managed through smart sourcing:
* Scrap Yards: An excellent source for heavy steel tubing, plate, and odd parts. Inspect for cracks or severe rust.
* Metal Suppliers: For new, guaranteed-quality steel. You’ll pay more but get precise dimensions and known metallurgy.
* Online Marketplaces: For items like the hydraulic jack.
* Key Principle: When in doubt, overbuild. A machine that flexes or fails under pressure is useless and dangerous.
Step-by-Step Assembly Guide (Core Process)
This is a conceptual guide. Always work from detailed, engineered plans for your specific design.
Phase 1: Building the Main Frame and Compression Chamber
- Memotong: Precisely cut all frame members to the dimensions in your plans using the angle grinder.
- Tack Welding: Assemble the frame on a flat surface (e.g., a leveled workbench). Use the combination square to ensure every angle is 90 degrees. Tack weld all joints.
- Final Welding: Once the entire frame is square and true, complete the welds. Weld both sides of joints where possible for maximum strength. Allow welds to cool slowly to prevent brittleness.
Phase 2: Fabricating the Mold and Ejection System
- Kotak Acuan: Weld the 1/4″ steel plates into an open-top box. The interior dimensions define your brick size (allow for ~10% shrinkage after compression and curing).
- Ejection Plate: Fabricate a steel plate that fits snugly inside the mold. This will be the “floor” that pushes the finished brick out.
- Mekanisme Pengusiran: This can be a simple lever system that lifts the ejection plate from below, or a design where the entire mold box tilts or opens.
Phase 3: Installing the Compression Mechanism
- For Hydraulic Jack Systems: Weld a sturdy mounting plate at the top center of the frame. The jack will sit here, pressing a “compression head” plate down into the mold.
- For Lever Systems: Design and install a strong pivot point above the mold. The lever must be long enough to provide a mechanical advantage sufficient to achieve high pressure. This often requires careful calculation.
- Penjajaran: The force must be applied perfectly vertically and centered. Any misalignment will cause binding and uneven bricks.
Preparing the Right Soil Mix for Durable Bricks
The best machine in the world will fail with poor material. Your soil is your recipe.
Soil Testing: The Key to Success
Start with the simple “jar test”:
1. Fill a clear jar 1/3 with dry, crushed soil.
2. Add water until the jar is 2/3 full, then shake vigorously for several minutes.
3. Let it settle for 24 hours. Layers will form: coarse sand at the bottom, silt in the middle, and clay on top.
4. Measure each layer. An ideal CEB mix often falls in the range of ~70% sand and gravel, 15-30% silt, and 10-20% clay.
Optimal Mix Formulas
- Stabilized Earth Block (Most Common & Recommended): Screened soil (free of organic matter) + 5-10% Portland cement by volume. Mix thoroughly dry first, then add water.
- High-Clay Brick: For a more traditional unfired adobe-style brick, you’ll want a mix with 25-30% clay. These require longer curing and protection from rain.
Moisture Content and Curing
- Moisture: The mix should be damp, not wet or crumbly. The “proctor test”: squeeze a handful tightly. It should form a firm ball that holds its shape and shows slight moisture on your fingers without dripping.
- Penyembuhan: This is where bricks gain strength. Keep stabilized blocks damp under plastic sheeting for 7-14 days, then allow to air-dry for several weeks before use. Never let them dry too quickly (cracking) or freeze while wet.
Critical Safety Protocols and Best Practices
Workshop and Build Safety
- Welding: Work in a well-ventilated area, free of flammables. Wear your full-face helmet and protective clothing to avoid arc flash and burns.
- Grinding/Cutting: Always use a guard on the angle grinder, wear a face shield over safety glasses, and secure the workpiece.
- Lifting: Get help with heavy steel components. Use proper lifting technique to avoid injury.
Operational Safety and Maintenance
- Inspect Before Use: Check all welds for cracks, ensure bolts are tight, and verify the hydraulic jack is functioning smoothly.
- Clear the Area: Keep hands, tools, and loose clothing clear of the compression area during operation.
- Translation: Penyelenggaraan: Regularly clean the mold, lubricate moving parts, and check for wear on the ejection system and compression plates.
Evaluating Cost, Time, and Practicality
Homemade vs. Commercial Machines: A Breakdown
| Factor | Homemade Machine | Small Commercial Machine |
| :— | :— | :— |
| Upfront Cost | $200 – $800+ (scrap vs. new materials) | $1,500 – $5,000+ |
| Capability | Customizable, but output is low (50-100 bricks/day). | Higher, consistent output. Engineered for production. |
| Ketahanan | Depends entirely on builder skill and material quality. | Professionally manufactured with warranties. |
| Time Investment | Tinggi. 40-100+ hours to build, plus learning curve. | Rendah. Unbox, set up, and start production. |
| Satisfaction | Extremely high if successful. A true DIY achievement. | Functional, but no personal creation aspect. |
Is Building Your Own Machine Worth It?
It is worth it if you:
* Have a specific, finite project (e.g., a garden perimeter, shed).
* Are located remotely where transporting bricks is prohibitively expensive.
* Possess intermediate-to-advanced welding/fabrication skills and enjoy the challenge.
* Value the knowledge and self-reliance as much as the end product.
You should consider buying if you:
* Need bricks for a large or time-sensitive project.
* Lack confidence in your metalworking abilities.
* Require certified, code-compliant bricks for a primary dwelling.
* Want a turn-key solution with reliable output.
Soalan Lazim (FAQ)
Q1: How much does it cost to build a homemade brick making machine?
A: The cost spectrum is wide. A minimalist build using scavenged scrap metal and a used jack can be under $200. A robust, all-new steel build with a quality jack and hardware will likely run between $500 and $800. Your investment is primarily time and skill.
Q2: What is the strongest brick mix I can make at home?
A: For a homemade press, a well-compacted cement-stabilized earth block (8-10% cement) with optimal soil grading and proper curing will yield the strongest result. However, it’s important to note that these still differ from kiln-fired clay bricks and have lower tensile strength. Their compressive strength can be ample for many applications.
Q3: Can I make bricks for a house or structural wall with a homemade machine?
A: This is the most critical question. You must consult a qualified structural engineer and your local building code office. Homemade bricks can be suitable for non-load-bearing structures like garden walls, sheds, or interior partitions. Using them for a primary residence’s load-bearing walls is a major engineering undertaking that requires professional mix design, testing, and approval.
Q4: Where can I find detailed DIY plans or blueprints?
A: Look to reputable engineering-for-development resources like Open Source Ecology, university agricultural or appropriate technology extensions (e.g., University of California, Davis), and dedicated DIY construction forums. Always vet plans carefully—look for ones that include material specs, weld diagrams, and stress calculations.
Q5: What are the most common mistakes to avoid?
A:
* Using under-spec materials: Thin metal that bends.
* Skipping soil testing: Guessing your mix leads to weak, crumbly bricks.
* Insufficient compression: Not achieving high enough pressure for proper block density.
* Neglecting curing: Letting bricks dry out too fast, causing cracks.
* Rushing safety: One lapse with a grinder or welder can cause serious injury.
Kesimpulan
Building a mesin pembuatan bata buatan sendiri is a journey that blends practical engineering, materials science, and old-fashioned hands-on skill. We’ve covered the path from understanding the core mechanics of compression to assembling a sturdy frame, fabricating a precise mold, and mastering the crucial art of the soil mix.
The advice here is rooted in practical, hands-on experience, designed to give you a clear-eyed view of the challenges and rewards. Our final recommendation is this: honestly assess your workshop skills, your project needs, and your local regulations. If you proceed, start methodically. Consider building a simple, single-brick mold prototype first to test your soil and process before committing to a full machine.
Have specific questions about weld types, soil ratios, or mechanism design? Share your thoughts below. For those looking to deepen their knowledge, we recommend further reading on soil mechanics and advanced workshop fabrication techniques.
<