
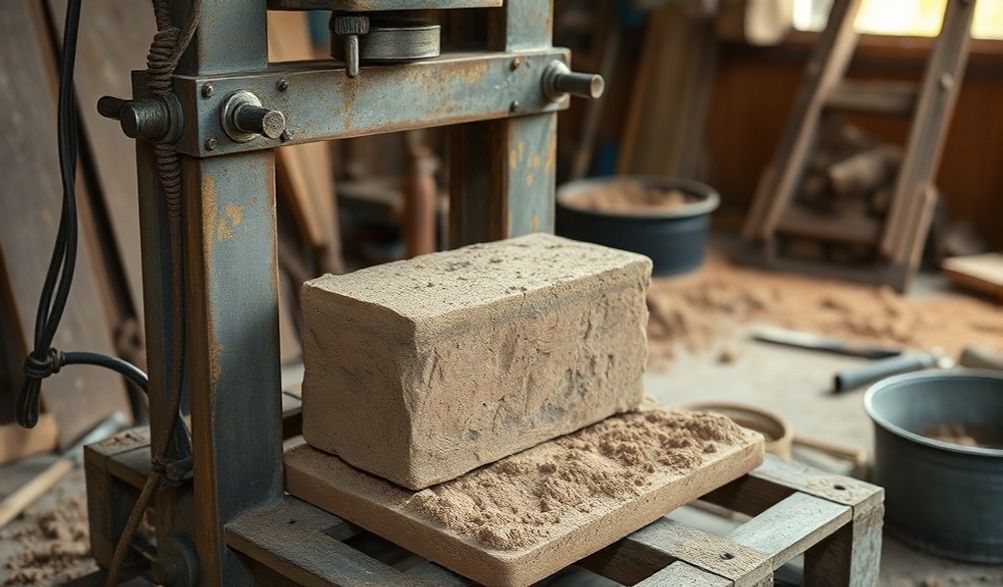
Hướng Dẫn Toàn Diện Để Chế Tạo Máy Làm Gạch Tự Chế Tại Nhà
Giới thiệu
Hãy tưởng tượng việc xây một bức tường vườn, một xưởng nhỏ, hay thậm chí một ngôi nhà từ những viên gạch tự tay bạn làm ra, sử dụng chính đất ngay dưới chân mình. Sức hấp dẫn của việc tự cung tự cấp, tiết kiệm chi phí vật liệu xây dựng đáng kể, và niềm thỏa mãn sâu sắc khi tạo ra thứ gì đó hữu hình và bền vững chính là điều đưa tinh thần tự làm (DIY) lên đỉnh cao. Chế tạo một máy làm gạch tại nhà là dự án tối thượng dành cho những ai muốn làm chủ nguồn tài nguyên xây dựng của mình.
Xuất phát từ nhiều năm kinh nghiệm thực tế trong xây dựng tự làm và máy móc quy mô nhỏ, hướng dẫn này được thiết kế để làm sáng tỏ quy trình. Chúng tôi sẽ dẫn dắt bạn qua mọi thứ từ cơ chế hoạt động cốt lõi của mộtmáy làm gạch tự chếlàm việc từ việc lắp ráp chi tiết cơ bản đến khoa học quan trọng của hỗn hợp đất trồng.
Tài liệu toàn diện này sẽ cung cấp cho bạn một cái nhìn tổng quan thực tế, từng bước để giúp bạn đánh giá liệu dự án đầy tham vọng này có phù hợp với kỹ năng, ngân sách và mục tiêu của bạn hay không. Một lưu ý quan trọng trước khi chúng ta bắt đầu: việc chế tạo một cỗ máy hoạt động được và an toàn đòi hỏi năng khiếu cơ khí vững vàng, tuân thủ nghiêm ngặt các quy trình an toàn, và kiểm tra có trách nhiệm các quy định xây dựng tại địa phương. Đây không phải là một dự án thủ công cuối tuần, nhưng đối với người đã chuẩn bị kỹ lưỡng, đây là một nỗ lực vô cùng xứng đáng.
Hiểu về Máy Sản Xuất Gạch và Cơ Chế Hoạt Động
Trước khi tìm nguồn kim loại hay bắt đầu hàn, điều cốt yếu là phải hiểu rõ bạn đang chế tạo thứ gì. Về bản chất, một máy làm gạch là công cụ nén đơn giản nhưng mạnh mẽ.
Máy Làm Gạch Hoạt Động Như Thế Nào?
Nguyên lý cốt lõi là phổ quát:vật liệu ẩm ướt, dễ uốn nắn được nén với lực cực lớn trong khuôn cứng để tạo thành khối đặc chắc, kết dính.Máy móc cung cấp cấu trúc để chứa đựng quá trình này và lợi thế cơ học để tạo ra áp lực cần thiết.
- Hệ Thống Vận Hành Bằng Tay (Đòn Bẩy):Đây là những kiểu phổ biến nhất cho thiết kế tự chế. Chúng sử dụng một đòn bẩy dài, thường kết hợp với một điểm xoay, để khuếch đại lực của người dùng lên một tấm ép. Hãy hình dung nó như một chiếc mỏ kẹp khổng lồ, chuyên dụng.
- Hệ thống Bán tự động (Có động cơ): These incorporate a hydraulic or mechanical press driven by an electric motor or engine. While more complex to build, they offer greater consistency and require less physical effort per brick.
The process is cyclical: fill the mold, apply compression, hold, release, and eject the formed brick.
Types of Bricks You Can Make at Home
Your machine’s mold design dictates the brick type. The most feasible for homemade machines are:
- Compressed Earth Blocks (CEB): These are dense blocks made from a suitable subsoil mix, compacted at high pressure. They can be stabilized with a small amount of cement (5-10%) for added durability and weather resistance.
- Gạch Lắp Ghép: These have patterned tops and bottoms that lock together, reducing or eliminating the need for mortar in some applications. They require a more complex mold but offer faster building.
- Simple Rectangular Blocks: The standard, solid brick shape. This is the easiest mold to fabricate and is perfect for learning the process and for general use.
The material mix—whether it’s a clay-rich soil, a sandier mix, or a cement-stabilized blend—will be chosen based on the brick type and its intended use.
Essential Tools and Materials for Your Build
A successful build starts with the right components. Strength and precision are non-negotiable here.
Metal Components & Structural Frame
This is the skeleton of your machine. Do not compromise on quality.
* Khung cấu trúc: Heavy-duty steel square tubing (minimum 2″x2″ with 1/8″ wall) or C-channel. This must resist bending under tons of pressure.
* Hộp khuôn: 1/4″ thick steel plate is ideal for the mold walls and compression plates. Thinner metal will warp.
* Fasteners & Hardware: High-tensile strength bolts, nuts, and washers. Heavy-duty hinges for any access doors or lids.
* Cơ chế nén: A 10-20 ton hydraulic bottle jack (the most common choice) or the materials to build a robust lever system (solid steel rod, pivot pins).
Tools You’ll Need in the Workshop
You will need access to a well-equipped metalworking shop:
* Welder: A MIG or ARC welder capable of welding 1/4″ steel. Strong, penetrating welds are critical.
* Angle Grinder: With cutting and grinding discs for shaping metal and cleaning welds.
* Drill Press or Heavy-Duty Hand Drill: For drilling precise holes in thick steel.
* Measuring & Layout Tools: Tape measure, combination square, marker, and center punch.
* Clamps: Multiple C-clamps or locking pliers to hold components square for welding.
* Safety Gear: Non-negotiable. Welding helmet, heavy-duty gloves, safety goggles, ear protection, and a respirator for grinding.
Sourcing Materials Responsibly
Cost can be managed through smart sourcing:
* Scrap Yards: An excellent source for heavy steel tubing, plate, and odd parts. Inspect for cracks or severe rust.
* Metal Suppliers: For new, guaranteed-quality steel. You’ll pay more but get precise dimensions and known metallurgy.
* Online Marketplaces: For items like the hydraulic jack.
* Key Principle: When in doubt, overbuild. A machine that flexes or fails under pressure is useless and dangerous.
Step-by-Step Assembly Guide (Core Process)
This is a conceptual guide. Always work from detailed, engineered plans for your specific design.
Phase 1: Building the Main Frame and Compression Chamber
- Cắt: Precisely cut all frame members to the dimensions in your plans using the angle grinder.
- Tack Welding: Assemble the frame on a flat surface (e.g., a leveled workbench). Use the combination square to ensure every angle is 90 degrees. Tack weld all joints.
- Final Welding: Once the entire frame is square and true, complete the welds. Weld both sides of joints where possible for maximum strength. Allow welds to cool slowly to prevent brittleness.
Phase 2: Fabricating the Mold and Ejection System
- Hộp khuôn: Weld the 1/4″ steel plates into an open-top box. The interior dimensions define your brick size (allow for ~10% shrinkage after compression and curing).
- Ejection Plate: Fabricate a steel plate that fits snugly inside the mold. This will be the “floor” that pushes the finished brick out.
- Ejection Mechanism: This can be a simple lever system that lifts the ejection plate from below, or a design where the entire mold box tilts or opens.
Phase 3: Installing the Compression Mechanism
- For Hydraulic Jack Systems: Weld a sturdy mounting plate at the top center of the frame. The jack will sit here, pressing a “compression head” plate down into the mold.
- For Lever Systems: Design and install a strong pivot point above the mold. The lever must be long enough to provide a mechanical advantage sufficient to achieve high pressure. This often requires careful calculation.
- Căn chỉnh The force must be applied perfectly vertically and centered. Any misalignment will cause binding and uneven bricks.
Preparing the Right Soil Mix for Durable Bricks
The best machine in the world will fail with poor material. Your soil is your recipe.
Soil Testing: The Key to Success
Start with the simple “jar test”:
1. Fill a clear jar 1/3 with dry, crushed soil.
2. Add water until the jar is 2/3 full, then shake vigorously for several minutes.
3. Let it settle for 24 hours. Layers will form: coarse sand at the bottom, silt in the middle, and clay on top.
4. Measure each layer. An ideal CEB mix often falls in the range of ~70% sand and gravel, 15-30% silt, and 10-20% clay.
Optimal Mix Formulas
- Stabilized Earth Block (Most Common & Recommended): Screened soil (free of organic matter) + 5-10% Portland cement by volume. Mix thoroughly dry first, then add water.
- High-Clay Brick: For a more traditional unfired adobe-style brick, you’ll want a mix with 25-30% clay. These require longer curing and protection from rain.
Moisture Content and Curing
- Moisture: The mix should be damp, not wet or crumbly. The “proctor test”: squeeze a handful tightly. It should form a firm ball that holds its shape and shows slight moisture on your fingers without dripping.
- Chữa bệnh: This is where bricks gain strength. Keep stabilized blocks damp under plastic sheeting for 7-14 days, then allow to air-dry for several weeks before use. Never let them dry too quickly (cracking) or freeze while wet.
Critical Safety Protocols and Best Practices
Workshop and Build Safety
- Welding: Work in a well-ventilated area, free of flammables. Wear your full-face helmet and protective clothing to avoid arc flash and burns.
- Grinding/Cutting: Always use a guard on the angle grinder, wear a face shield over safety glasses, and secure the workpiece.
- Lifting: Get help with heavy steel components. Use proper lifting technique to avoid injury.
Operational Safety and Maintenance
- Inspect Before Use: Check all welds for cracks, ensure bolts are tight, and verify the hydraulic jack is functioning smoothly.
- Clear the Area: Keep hands, tools, and loose clothing clear of the compression area during operation.
- Maintenance: Regularly clean the mold, lubricate moving parts, and check for wear on the ejection system and compression plates.
Evaluating Cost, Time, and Practicality
Homemade vs. Commercial Machines: A Breakdown
| Factor | Homemade Machine | Small Commercial Machine |
| :— | :— | :— |
| Upfront Cost | $200 – $800+ (scrap vs. new materials) | $1,500 – $5,000+ |
| Capability | Customizable, but output is low (50-100 bricks/day). | Higher, consistent output. Engineered for production. |
| Độ bền | Depends entirely on builder skill and material quality. | Professionally manufactured with warranties. |
| Time Investment | Chào. 40-100+ hours to build, plus learning curve. | Thấp. Unbox, set up, and start production. |
| Satisfaction | Extremely high if successful. A true DIY achievement. | Functional, but no personal creation aspect. |
Is Building Your Own Machine Worth It?
It is worth it if you:
* Have a specific, finite project (e.g., a garden perimeter, shed).
* Are located remotely where transporting bricks is prohibitively expensive.
* Possess intermediate-to-advanced welding/fabrication skills and enjoy the challenge.
* Value the knowledge and self-reliance as much as the end product.
You should consider buying if you:
* Need bricks for a large or time-sensitive project.
* Lack confidence in your metalworking abilities.
* Require certified, code-compliant bricks for a primary dwelling.
* Want a turn-key solution with reliable output.
Các Câu Hỏi Thường Gặp (FAQ)
Q1: How much does it cost to build a homemade brick making machine?
A: The cost spectrum is wide. A minimalist build using scavenged scrap metal and a used jack can be under $200. A robust, all-new steel build with a quality jack and hardware will likely run between $500 and $800. Your investment is primarily time and skill.
Q2: What is the strongest brick mix I can make at home?
A: For a homemade press, a well-compacted cement-stabilized earth block (8-10% cement) with optimal soil grading and proper curing will yield the strongest result. However, it’s important to note that these still differ from kiln-fired clay bricks and have lower tensile strength. Their compressive strength can be ample for many applications.
Q3: Can I make bricks for a house or structural wall with a homemade machine?
A: This is the most critical question. You must consult a qualified structural engineer and your local building code office. Homemade bricks can be suitable for non-load-bearing structures like garden walls, sheds, or interior partitions. Using them for a primary residence’s load-bearing walls is a major engineering undertaking that requires professional mix design, testing, and approval.
Q4: Where can I find detailed DIY plans or blueprints?
A: Look to reputable engineering-for-development resources like Open Source Ecology, university agricultural or appropriate technology extensions (e.g., University of California, Davis), and dedicated DIY construction forums. Always vet plans carefully—look for ones that include material specs, weld diagrams, and stress calculations.
Q5: What are the most common mistakes to avoid?
A:
* Using under-spec materials: Thin metal that bends.
* Skipping soil testing: Guessing your mix leads to weak, crumbly bricks.
* Insufficient compression: Not achieving high enough pressure for proper block density.
* Neglecting curing: Letting bricks dry out too fast, causing cracks.
* Rushing safety: One lapse with a grinder or welder can cause serious injury.
Conclusion
Building a máy làm gạch tự chế is a journey that blends practical engineering, materials science, and old-fashioned hands-on skill. We’ve covered the path from understanding the core mechanics of compression to assembling a sturdy frame, fabricating a precise mold, and mastering the crucial art of the soil mix.
The advice here is rooted in practical, hands-on experience, designed to give you a clear-eyed view of the challenges and rewards. Our final recommendation is this: honestly assess your workshop skills, your project needs, and your local regulations. If you proceed, start methodically. Consider building a simple, single-brick mold prototype first to test your soil and process before committing to a full machine.
Have specific questions about weld types, soil ratios, or mechanism design? Share your thoughts below. For those looking to deepen their knowledge, we recommend further reading on soil mechanics and advanced workshop fabrication techniques.
<