
La Guía Completa de Máquinas Manuales para Fabricar Bloques de Entrelazado: Costo, Proceso y Beneficios
Introducción
Para constructores, líderes comunitarios y propietarios de viviendas en todo el mundo, el sueño de una construcción asequible y duradera a menudo choca con una cruda realidad: el costo creciente y el impacto ambiental de los materiales convencionales. Los ladrillos de arcilla cocida requieren una energía significativa, contribuyen a la deforestación, y solo su transporte puede inflar los presupuestos de los proyectos más allá de lo alcanzable. Este desafío es particularmente agudo en áreas remotas y para aquellos con capital limitado.
Pero, ¿y si la solución no fuera solo un producto diferente, sino un proceso diferente, uno que pudieras controlar? Basada en décadas de refinamiento de ingeniería y aplicación práctica en la construcción sostenible, la máquina manual para fabricar bloques de enclavamiento representa precisamente eso. Esta no es una tecnología especulativa; es una prensa manual probada que transforma tierra disponible localmente en bloques de construcción robustos y entrelazados.
Esta guía sirve como su recurso integral. Ya sea que sea un constructor que explora métodos para ahorrar costos, un emprendedor que busca una oportunidad de negocio pequeño, una ONG que planea un proyecto comunitario o un entusiasta del bricolaje dedicado, desmitificaremos esta poderosa herramienta. Cubriremos exactamente cómo funciona, sus beneficios tangibles, un proceso de producción detallado paso a paso y los factores críticos a considerar antes de invertir. Nuestro objetivo es proporcionar la información confiable y profunda que necesita para tomar una decisión informada para su proyecto y contexto específicos.
¿Qué es una Máquina Manual para Hacer Bloques de Interconexión?
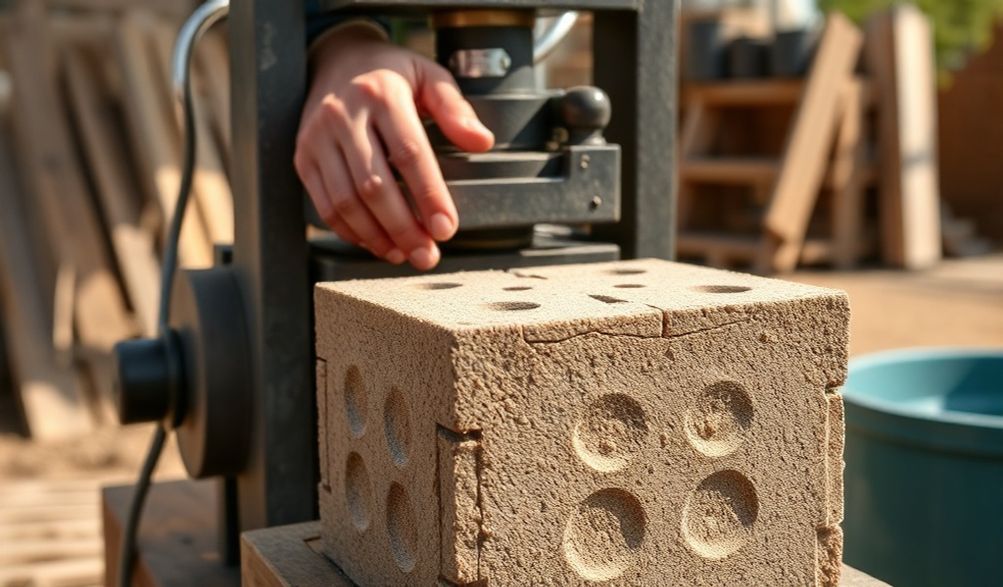
En esencia, una máquina manual para fabricar bloques entrelazados es un dispositivo accionado por humanos diseñado para comprimir una mezcla de tierra húmeda, arena y un pequeño porcentaje de cemento en bloques de alta densidad y con formas geométricas que se entrelazan. Evita la necesidad de cocción en horno, ofreciendo una ruta radicalmente simplificada desde la tierra cruda hasta la unidad de construcción terminada.
Función Principal y Diseño
La máquina es un elegante estudio en ventaja mecánica. Aunque los diseños varían, los componentes fundamentales son consistentes:
- Sistema de Palanca.Un largo brazo de palanca de acero proporciona la fuerza necesaria. El peso y la fuerza del operador se amplifican a través de esta máquina simple para lograr una alta compresión.
- Molde/Matriz:Esta es la cavidad que le da al bloque su forma. Normalmente está hecha de acero endurecido para soportar la presión constante y la abrasión.
- Cámara de Compresión:Donde se carga la mezcla de materia prima. Un pistón o cabezal de prensa, accionado por la palanca, compacta la mezcla verticalmente con una fuerza inmensa.
- Diseño de Llave de Interconexión:Integrado en el molde, esto crea las lengüetas y ranuras características de los bloques, o los salientes y cavidades, en la parte superior, inferior y laterales.
El proceso es cíclico: llenar, comprimir, expulsar. En la práctica, un operador hábil puede producir un bloque en menos de un minuto.
La Ciencia de los Bloques de Interconexión
La genialidad de este sistema no radica solo en la compresión, sino en la conexión. El diseño entrelazado crea un vínculo mecánico entre los bloques.
- Eliminación de Mortero:El ajuste preciso y entrelazado elimina la necesidad de juntas verticales de mortero. Solo se suele utilizar una fina capa horizontal de mortero para asegurar un curso nivelado.
- Beneficios Inherentes:Esto conduce a velocidades de construcción más rápidas (ya que no hay mortero por el que esperar), una dependencia reducida de albañiles altamente calificados y ahorros significativos de materiales.
- Integridad Estructural:El patrón de entrelazado crea una pared que actúa más como una matriz unificada y flexible. Observaciones de campo en zonas sísmicas han demostrado que los muros de bloques entrelazados bien construidos pueden exhibir una mejor resistencia a las grietas que la mampostería convencional, ya que el entrelazado permite un movimiento leve sin fallos catastróficos.
Ventajas Clave de Usar una Prensa de Bloques Manual
Elegir una prensa manual es una decisión estratégica con beneficios multifacéticos, que van desde lo económico hasta lo ecológico y el empoderamiento.
Relación calidad-precio excepcional
El caso financiero es convincente, especialmente para proyectos de pequeña y mediana escala.
- Baja Inversión de Capital:En comparación con las plantas de bloques motorizadas o hidráulicas que cuestan decenas de miles, una prensa manual de alta calidad representa un costo inicial mínimo.
- Reducción Radical del Costo de Materiales: The primary ingredient—soil—is often available on-site or locally for little to no cost. Cement usage is minimal (typically 5-10% by volume).
- Ongoing Savings: Eliminating vertical mortar saves approximately 30-50% of mortar costs and related labor.
Sustainability and Eco-Friendly Construction
This technology aligns perfectly with green building principles.
- Localized Material Use: Utilizing 70-90% in-situ materials drastically cuts the carbon emissions and cost associated with transporting heavy building materials.
- Low Embodied Energy: With no firing process, the energy input is virtually limited to human labor and the small cement fraction. This contrasts sharply with fired bricks, which are major consumers of coal or firewood.
- Non-Toxic & Recyclable: The blocks are made from natural earth and stabilize with cement. At end-of-life, they can be crushed and returned to the earth or re-used as aggregate.
Empowerment and Operational Simplicity
Perhaps the most profound advantage is the shift in control it offers.
- Producción Bajo Demanda: You are no longer at the mercy of supplier schedules or market price fluctuations. Blocks can be produced as needed, on-site.
- Low Technical Barrier: Operation can be learned in a matter of hours. Training focuses more on material preparation than complex machinery operation.
- Ideal for Diverse Contexts: This makes it a tool of choice for self-help housing projects, remote community development, disaster reconstruction (as promoted by organizations like UN-Habitat), and small-scale entrepreneurial ventures.
The Step-by-Step Block Production Process
Success with a manual press hinges on process, not just the machine. Here is the proven workflow, drawn from field-tested best practices.
Stage 1: Material Selection and Preparation
This is the most critical phase. Poor materials guarantee poor blocks.
- Pruebas de Suelo: Not all soil is suitable. You need a balanced mix of clay (as a binder), silt, and sand (for stability). Simple field tests are essential:
- Jar Test: Fill a clear jar with 1/3 soil and 2/3 water, shake vigorously, and let it settle over 24 hours. The layers will reveal the approximate proportions of sand, silt, and clay.
- Ribbon Test: Moisten a handful of soil and try to roll it into a thin ribbon. If it forms a long, flexible ribbon, it’s too clay-rich. If it crumbles immediately, it’s too sandy. A moderate ribbon that breaks is often a good sign.
- Diseño de Mezcla: A common starting formula is approximately 70% soil, 25% sand, and 5% cement by volume. The sand corrects clay-heavy soil. Moisture content is crucial: The mix must be damp enough to bind, but not wet. The “hand-squeeze test” is key—a squeezed handful should form a ball that holds its shape without crumbling or dripping water.
Stage 2: Compression and Molding
With your properly prepared mix, you move to the machine.
- Load: Fill the compression chamber evenly with the mix. Do not overfill or underfill; consistency is key for uniform block density.
- Comprimir: Pull down the lever arm firmly and steadily. You will feel significant resistance as the mix compacts. Apply full pressure. Some machines require a second “locking” press.
- Expulsar: Release the lever, open any latches, and pull the lever again to raise the piston and eject the fresh “green” block onto a pallet or board.
Stage 3: Curing and Quality Control
Fresh blocks are fragile and must be handled with care.
- Curado: Stack the green blocks in a shaded area and cover them with a plastic sheet. This traps moisture and allows the cement to hydrate slowly, gaining strength. Light watering for the first 7-10 days is beneficial. Avoid rapid drying in direct sun, which causes cracking.
- Control de Calidad: Perform simple tests:
- Drop Test: After 7 days, lift a block to waist height and drop it onto a firm, flat surface. A good quality block should not break or chip severely.
- Inspección Visual: Check for large cracks, crumbling edges, or uneven shapes, which indicate incorrect mix or compression.
Critical Factors Before You Buy or Use One
A balanced, authoritative guide must address practical realities. Informed preparation prevents costly mistakes.
Evaluando los Requisitos de su Proyecto
Ask yourself these questions first:
- What is my daily block requirement? (A manual press typically produces 80-150 blocks per 8-hour day with a crew).
- What soil types are available on or near my site? (Plan for testing and potential sand purchase).
- Is this for a single home, a community building, or a commercial block-making business? Scale dictates feasibility.
Machine Specifications and Features to Compare
Not all machines are created equal. Scrutinize these aspects:
- Block Size & Design: Common sizes are similar to standard bricks or larger (e.g., 225mm x 110mm x 75mm). Ensure the interlocking pattern is robust.
- Capacidad de Producción: Linked to design efficiency. Test the lever mechanics—the action should be smooth and solid.
- Calidad de Construcción: Inspect weld points, steel thickness (especially the mold and lever), and overall finish. A heavier machine often indicates more durable steel.
- Support System: Does the supplier offer spare parts (like wear plates for the mold)? Is there technical support available?
Understanding Limitations and Challenges
Acknowledging these builds trust and sets realistic expectations:
- Labor Intensive: High-volume projects (e.g., a large school) require a significant, organized labor force.
- Soil Dependency: If your local soil is purely organic topsoil or gravel, you may need to import suitable material, affecting cost.
- Velocidad de Producción: It cannot match the output of a fully automated electric or hydraulic machine. It is a tool for appropriate-scale projects.
Applications and Project Ideas
The versatility of interlocking blocks opens numerous doors:
- Affordable Housing and Community Projects: This is the primary application. From individual homes to clinics, schools, and community centers, the technology is championed by development organizations globally for its cost-control and community participation potential.
- Landscape and Garden Construction: A perfect pilot project. Build retaining walls, raised garden beds, compost bins, or decorative pathways. It’s a low-risk way to master the process.
- Entrepreneurial Opportunity: Starting a Small Block Yard Business: With one or two machines, you can establish a micro-enterprise, producing and selling blocks to local builders. Focus on consistent quality and educate your market on the benefits.
FAQ Section
Q: How strong are interlocking soil blocks compared to fired bricks?
A: Compressive strength typically ranges from 3 to 7 Megapascals (MPa), which is suitable for load-bearing walls in 1-2 story buildings, as per many building codes. While high-quality fired bricks can be stronger, properly made interlocking blocks provide more than adequate strength for most low-rise residential construction. The key is proper material selection and production.
Q: Can I use pure soil from my backyard?
A: Almost certainly not. Backyard topsoil contains organic matter, which decomposes and compromises block strength. You need mineral subsoil, typically found below the top 300mm. A simple jar test will tell you if it needs sand or clay amendment.
Q: Is a foundation different for interlocking blocks?
A: Yes, and getting it right is non-negotiable. The interlocking system begins above a stable, perfectly level base. A standard concrete strip foundation or a mortared rubble trench foundation is used. The first course of blocks is then laid in a full bed of mortar on this “plinth” to create a level starting point for the dry-stack interlocking system.
Q: What is the typical cost range for a good quality manual machine?
A: Prices vary widely by region, quality, and features. As a general guide, expect a range from approximately $500 to $2,000 USD. Be wary of machines at the very bottom end; they may use inferior steel and wear out quickly. Invest in robust construction from a reputable supplier.
Q: Where can I get training on using the machine?
A: Start with your machine supplier; many offer basic training. Look for NGOs or social enterprises working in sustainable construction (e.g., organizations inspired by the Good Earth Trust or Habitat for Humanity’s techniques). Reputable online video tutorials can also provide excellent visual guidance on the process.
Conclusión
The manual interlocking block making machine is far more than a simple tool; it’s an enabler of affordable, sustainable, and community-empowered construction. It shifts the focus from buying expensive materials to understanding and utilizing local resources intelligently.
Our final expert insight is this: the machine’s success is only 50% dependent on its steel and leverage. The other 50% resides in the operator’s knowledge of material science and disciplined process. The true “technology” is the holistic system of soil, water, cement, compression, and care.
Your clear next step is to move from theory to practice. Begin with a simple jar test on your site’s soil. Reach out to local suppliers to inspect machines firsthand. Connect with others who have used this technology. Consider starting with a small, non-critical project like a garden wall. This hands-on experience is invaluable. Remember, prioritize learning and preparation—your first 100 blocks are a learning process that will pave the way to successful, durable construction.
<