
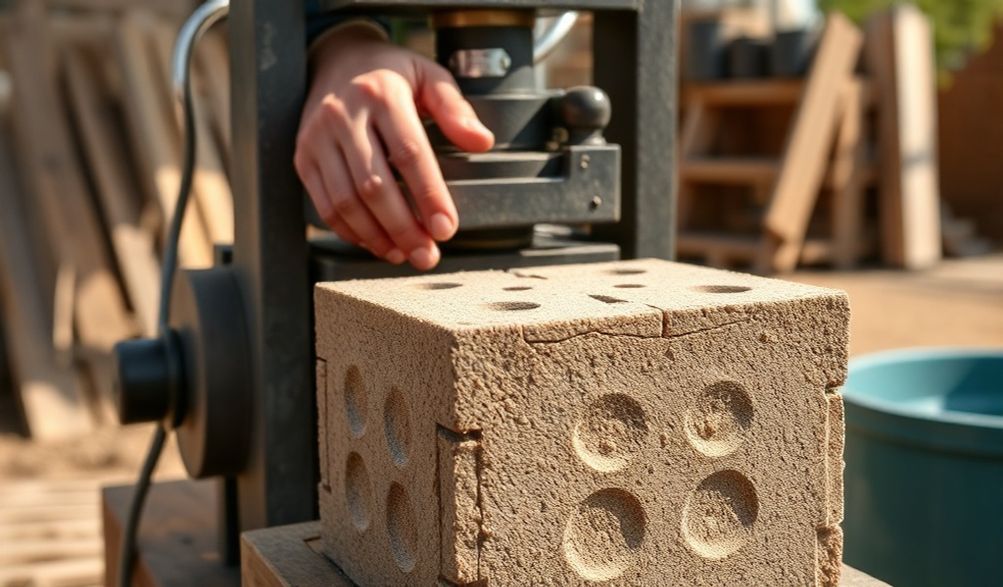
Le guide complet des machines à fabriquer manuellement des blocs de verrouillage : Coût, processus et avantages
Introduction
Pour les constructeurs, les leaders communautaires et les propriétaires du monde entier, le rêve d'une construction abordable et durable se heurte souvent à une réalité brutale : le coût exorbitant et le lourd tribut environnemental des matériaux conventionnels. Les briques d'argile cuite exigent une énergie considérable, contribuent à la déforestation, et leur seul transport peut faire exploser les budgets des projets, les rendant inaccessibles. Ce défi est particulièrement aigu dans les régions éloignées et pour ceux dont le capital est limité.
Et si la solution n'était pas simplement un produit différent, mais un processus différent — un que vous pourriez contrôler ? Fondée sur des décennies de perfectionnement en ingénierie et d'application sur le terrain dans la construction durable, la machine manuelle à fabriquer des blocs à emboîtement représente exactement cela. Ce n'est pas une technologie spéculative ; c'est une presse manuelle éprouvée qui transforme la terre localement disponible en blocs de construction solides et à emboîtement.
Ce guide constitue votre ressource complète. Que vous soyez un constructeur explorant des méthodes d'économie, un entrepreneur envisageant une opportunité de petite entreprise, une ONG planifiant un projet communautaire ou un passionné de bricolage dévoué, nous démystifierons cet outil puissant. Nous aborderons précisément son fonctionnement, ses avantages tangibles, un processus de production détaillé étape par étape, ainsi que les facteurs critiques à considérer avant d'investir. Notre objectif est de vous fournir les informations fiables et approfondies dont vous avez besoin pour prendre une décision éclairée, adaptée à votre projet et à votre contexte spécifiques.
Qu'est-ce qu'une machine manuelle à fabriquer des blocs d'imbrication ?
À la base, une machine manuelle de fabrication de blocs à emboîtement est un dispositif actionné par la force humaine, conçu pour comprimer un mélange de terre humide, de sable et d’une faible proportion de ciment en blocs à haute densité et à géométrie imbriquée. Elle élimine le besoin de cuisson au four, offrant ainsi une voie radicalement simplifiée de la terre brute à l’unité de construction finie.
Fonction principale et conception
La machine est une étude élégante de l'avantage mécanique. Bien que les conceptions varient, les composants fondamentaux demeurent constants :
- Système de levier :Un long bras de levier en acier fournit la force nécessaire. Le poids et la force de l'opérateur sont amplifiés grâce à cette machine simple pour atteindre une compression élevée.
- Moule/Matrice:C’est la cavité qui donne sa forme au bloc. Elle est généralement en acier trempé pour résister à la pression constante et à l’abrasion.
- Chambre de compression :Là où le mélange de matières premières est chargé. Un piston ou une tête de presse, actionné par le levier, compacte le mélange verticalement avec une force immense.
- Conception de clé à imbrication :Intégré dans le moule, cela crée les languettes et rainures ou les tenons et cavités caractéristiques des blocs sur le dessus, le dessous et les côtés.
Le processus est cyclique : remplir, comprimer, éjecter. En pratique, un opérateur qualifié peut produire un bloc en moins d'une minute.
La science des blocs à emboîtement
Le génie de ce système réside non seulement dans la compression, mais aussi dans la connexion. La conception imbriquée crée une liaison mécanique entre les blocs.
- Élimination du mortierL'ajustement précis et imbriqué élimine le besoin de joints de mortier verticaux. Seul un lit mince et horizontal de mortier est généralement utilisé pour assurer un niveau de rangée uniforme.
- Avantages inhérents :Cela permet des vitesses de construction plus rapides (puisqu'il n'y a pas de mortier à attendre), une dépendance réduite envers des maçons hautement qualifiés et des économies de matériaux significatives.
- Intégrité structurelle :Le motif imbriqué crée un mur qui agit davantage comme une matrice unifiée et flexible. Des observations sur le terrain dans des zones sismiques ont montré que les murs en blocs imbriqués bien construits peuvent présenter une meilleure résistance aux fissures que la maçonnerie conventionnelle, car l'imbrication permet un léger mouvement sans défaillance catastrophique.
Avantages clés de l'utilisation d'une presse à blocs manuelle
Choisir une presse manuelle est une décision stratégique offrant des avantages multiples, allant de l'économie à l'écologie et à l'autonomisation.
Rapport qualité-prix exceptionnel
Le cas financier est convaincant, surtout pour les projets de petite à moyenne envergure.
- Investissement en capital faible :Comparé aux installations de blocs motorisées ou hydrauliques qui coûtent des dizaines de milliers de dollars, une presse manuelle de haute qualité représente un investissement initial minime.
- Réduction radicale des coûts de matériaux.L'ingrédient principal — le sol — est souvent disponible sur place ou localement à peu de frais, voire gratuitement. L'utilisation de ciment est minimale (généralement 5 à 10 % en volume).
- Économies continues :L'élimination du mortier vertical permet d'économiser environ 30 à 50 % des coûts de mortier et de la main-d'œuvre associée.
Durabilité et construction écologique
Cette technologie s’aligne parfaitement avec les principes de construction écologique.
- Utilisation de matériaux localisésL'utilisation de 70 à 90 % de matériaux in situ réduit considérablement les émissions de carbone et les coûts liés au transport de matériaux de construction lourds.
- Faible énergie intrinsèque : With no firing process, the energy input is virtually limited to human labor and the small cement fraction. This contrasts sharply with fired bricks, which are major consumers of coal or firewood.
- Non-Toxic & Recyclable: The blocks are made from natural earth and stabilize with cement. At end-of-life, they can be crushed and returned to the earth or re-used as aggregate.
Empowerment and Operational Simplicity
Perhaps the most profound advantage is the shift in control it offers.
- Production à la demande : You are no longer at the mercy of supplier schedules or market price fluctuations. Blocks can be produced as needed, on-site.
- Low Technical Barrier: Operation can be learned in a matter of hours. Training focuses more on material preparation than complex machinery operation.
- Ideal for Diverse Contexts: This makes it a tool of choice for self-help housing projects, remote community development, disaster reconstruction (as promoted by organizations like UN-Habitat), and small-scale entrepreneurial ventures.
The Step-by-Step Block Production Process
Success with a manual press hinges on process, not just the machine. Here is the proven workflow, drawn from field-tested best practices.
Stage 1: Material Selection and Preparation
This is the most critical phase. Poor materials guarantee poor blocks.
- Test du sol : Not all soil is suitable. You need a balanced mix of clay (as a binder), silt, and sand (for stability). Simple field tests are essential:
- Jar Test: Fill a clear jar with 1/3 soil and 2/3 water, shake vigorously, and let it settle over 24 hours. The layers will reveal the approximate proportions of sand, silt, and clay.
- Ribbon Test: Moisten a handful of soil and try to roll it into a thin ribbon. If it forms a long, flexible ribbon, it’s too clay-rich. If it crumbles immediately, it’s too sandy. A moderate ribbon that breaks is often a good sign.
- Conception du mélange: A common starting formula is approximately 70% soil, 25% sand, and 5% cement by volume. The sand corrects clay-heavy soil. Moisture content is crucial: The mix must be damp enough to bind, but not wet. The “hand-squeeze test” is key—a squeezed handful should form a ball that holds its shape without crumbling or dripping water.
Stage 2: Compression and Molding
With your properly prepared mix, you move to the machine.
- Load: Fill the compression chamber evenly with the mix. Do not overfill or underfill; consistency is key for uniform block density.
- Compresser : Pull down the lever arm firmly and steadily. You will feel significant resistance as the mix compacts. Apply full pressure. Some machines require a second “locking” press.
- Éjecter : Release the lever, open any latches, and pull the lever again to raise the piston and eject the fresh “green” block onto a pallet or board.
Stage 3: Curing and Quality Control
Fresh blocks are fragile and must be handled with care.
- Guérison : Stack the green blocks in a shaded area and cover them with a plastic sheet. This traps moisture and allows the cement to hydrate slowly, gaining strength. Light watering for the first 7-10 days is beneficial. Avoid rapid drying in direct sun, which causes cracking.
- Contrôle de la qualité : Perform simple tests:
- Drop Test: After 7 days, lift a block to waist height and drop it onto a firm, flat surface. A good quality block should not break or chip severely.
- Visual Inspection: Check for large cracks, crumbling edges, or uneven shapes, which indicate incorrect mix or compression.
Critical Factors Before You Buy or Use One
A balanced, authoritative guide must address practical realities. Informed preparation prevents costly mistakes.
Évaluation de vos exigences de projet
Ask yourself these questions first:
- What is my daily block requirement? (A manual press typically produces 80-150 blocks per 8-hour day with a crew).
- What soil types are available on or near my site? (Plan for testing and potential sand purchase).
- Is this for a single home, a community building, or a commercial block-making business? Scale dictates feasibility.
Machine Specifications and Features to Compare
Not all machines are created equal. Scrutinize these aspects:
- Block Size & Design: Common sizes are similar to standard bricks or larger (e.g., 225mm x 110mm x 75mm). Ensure the interlocking pattern is robust.
- Capacité de production : Linked to design efficiency. Test the lever mechanics—the action should be smooth and solid.
- Qualité de construction : Inspect weld points, steel thickness (especially the mold and lever), and overall finish. A heavier machine often indicates more durable steel.
- Support System: Does the supplier offer spare parts (like wear plates for the mold)? Is there technical support available?
Understanding Limitations and Challenges
Acknowledging these builds trust and sets realistic expectations:
- Labor Intensive: High-volume projects (e.g., a large school) require a significant, organized labor force.
- Soil Dependency: If your local soil is purely organic topsoil or gravel, you may need to import suitable material, affecting cost.
- Vitesse de production It cannot match the output of a fully automated electric or hydraulic machine. It is a tool for appropriate-scale projects.
Applications and Project Ideas
The versatility of interlocking blocks opens numerous doors:
- Affordable Housing and Community Projects: This is the primary application. From individual homes to clinics, schools, and community centers, the technology is championed by development organizations globally for its cost-control and community participation potential.
- Landscape and Garden Construction: A perfect pilot project. Build retaining walls, raised garden beds, compost bins, or decorative pathways. It’s a low-risk way to master the process.
- Entrepreneurial Opportunity: Starting a Small Block Yard Business: With one or two machines, you can establish a micro-enterprise, producing and selling blocks to local builders. Focus on consistent quality and educate your market on the benefits.
FAQ Section
Q: How strong are interlocking soil blocks compared to fired bricks?
A : Compressive strength typically ranges from 3 to 7 Megapascals (MPa), which is suitable for load-bearing walls in 1-2 story buildings, as per many building codes. While high-quality fired bricks can be stronger, properly made interlocking blocks provide more than adequate strength for most low-rise residential construction. The key is proper material selection and production.
Q: Can I use pure soil from my backyard?
A : Almost certainly not. Backyard topsoil contains organic matter, which decomposes and compromises block strength. You need mineral subsoil, typically found below the top 300mm. A simple jar test will tell you if it needs sand or clay amendment.
Q: Is a foundation different for interlocking blocks?
A : Yes, and getting it right is non-negotiable. The interlocking system begins above a stable, perfectly level base. A standard concrete strip foundation or a mortared rubble trench foundation is used. The first course of blocks is then laid in a full bed of mortar on this “plinth” to create a level starting point for the dry-stack interlocking system.
Q: What is the typical cost range for a good quality manual machine?
A : Prices vary widely by region, quality, and features. As a general guide, expect a range from approximately $500 to $2,000 USD. Be wary of machines at the very bottom end; they may use inferior steel and wear out quickly. Invest in robust construction from a reputable supplier.
Q: Where can I get training on using the machine?
A : Start with your machine supplier; many offer basic training. Look for NGOs or social enterprises working in sustainable construction (e.g., organizations inspired by the Good Earth Trust or Habitat for Humanity’s techniques). Reputable online video tutorials can also provide excellent visual guidance on the process.
Conclusion
The manual interlocking block making machine is far more than a simple tool; it’s an enabler of affordable, sustainable, and community-empowered construction. It shifts the focus from buying expensive materials to understanding and utilizing local resources intelligently.
Our final expert insight is this: the machine’s success is only 50% dependent on its steel and leverage. The other 50% resides in the operator’s knowledge of material science and disciplined process. The true “technology” is the holistic system of soil, water, cement, compression, and care.
Your clear next step is to move from theory to practice. Begin with a simple jar test on your site’s soil. Reach out to local suppliers to inspect machines firsthand. Connect with others who have used this technology. Consider starting with a small, non-critical project like a garden wall. This hands-on experience is invaluable. Remember, prioritize learning and preparation—your first 100 blocks are a learning process that will pave the way to successful, durable construction.
<